为什么叫随记呢
因为前面的笔记过于详细,从头到尾完整记下来会花掉很多时间…
so这篇就记得随意一点吧
Spring和SpringMVC都只是快速过了一下(跟没看一样 ^_^
Web容器基本配置
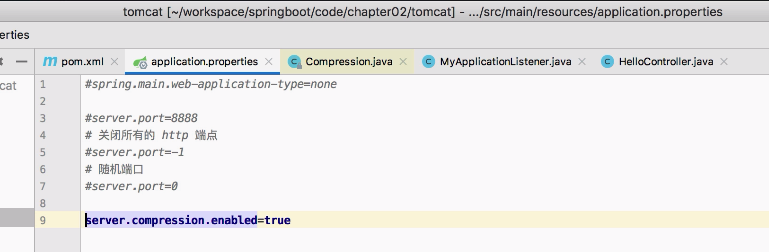
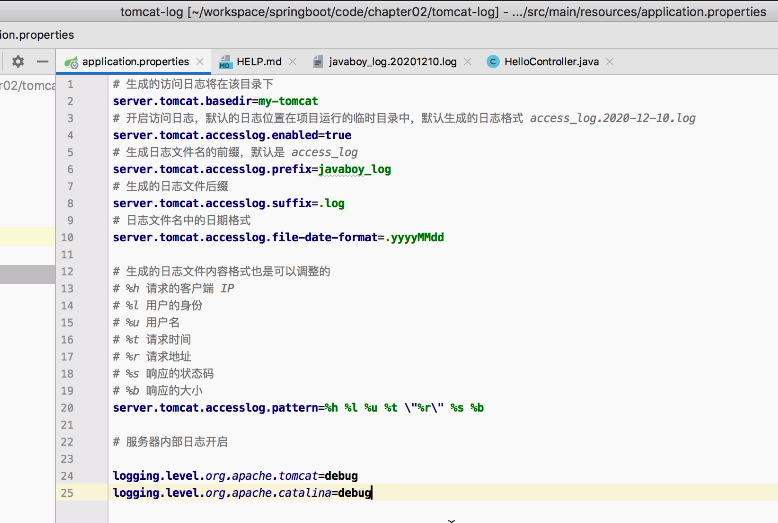
Tomcat配置
日志
HTTPS证书
生成秘钥复制到resource目录下
1
| keytool -genkey -alias myhttps -keyalg RSA -keysize 2048 -keystore zhengru_key.p12 -validity 365
|
在application.properties中配置证书
1
2
3
| server.ssl.key-alias=myhttps
server.ssl.key-store=classpath:zhengru_key.p12
server.ssl.key-store-password=123456
|
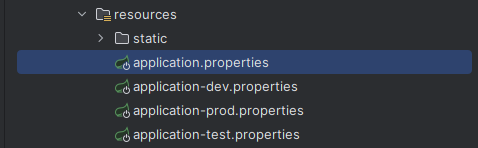
配置文件名称和路径
位置问题
位置可以在一下四个地方
当然也可以用spring.config.location来指定其他位置
配置文件位置时,值一定要以/结尾
例如:spring.config.location=classpath:/javaboy/

文件名问题
默认是叫application但是也可以指定其他的文件名
用spring.config.name来指定
例如:spring.config.name=app.properties
普通的属性注入
spring里的东西,跟springboot没有关系
使用Value注解属性注入,数组也可以注入但是注意要用英文逗号隔开
这里注意要在设置中更改文件编码为UTF-8
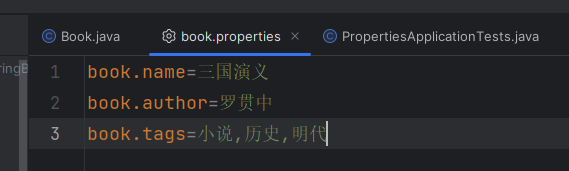
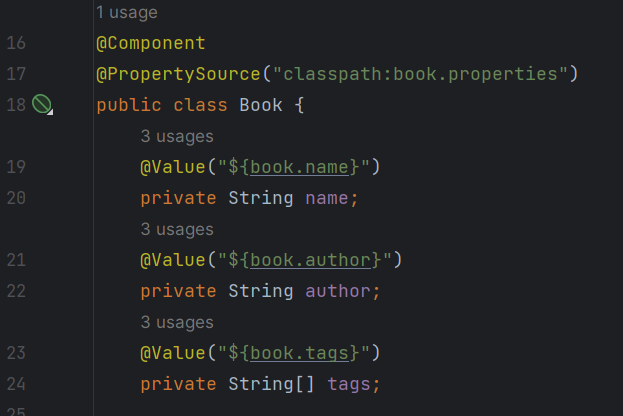
类型安全的属性注入
使用@ConfigurationProperties(prefix = "xxx")设置前缀是xxx,就会自动注入
1
2
3
4
5
6
7
8
9
| @Component
@PropertySource("classpath:book.properties")
@ConfigurationProperties(prefix = "book")
public class Book {
private String name;
private String author;
private String[] tags;
}
|
在配置文件中引用maven配置
需要使用@xxx@,因为会和${}冲突
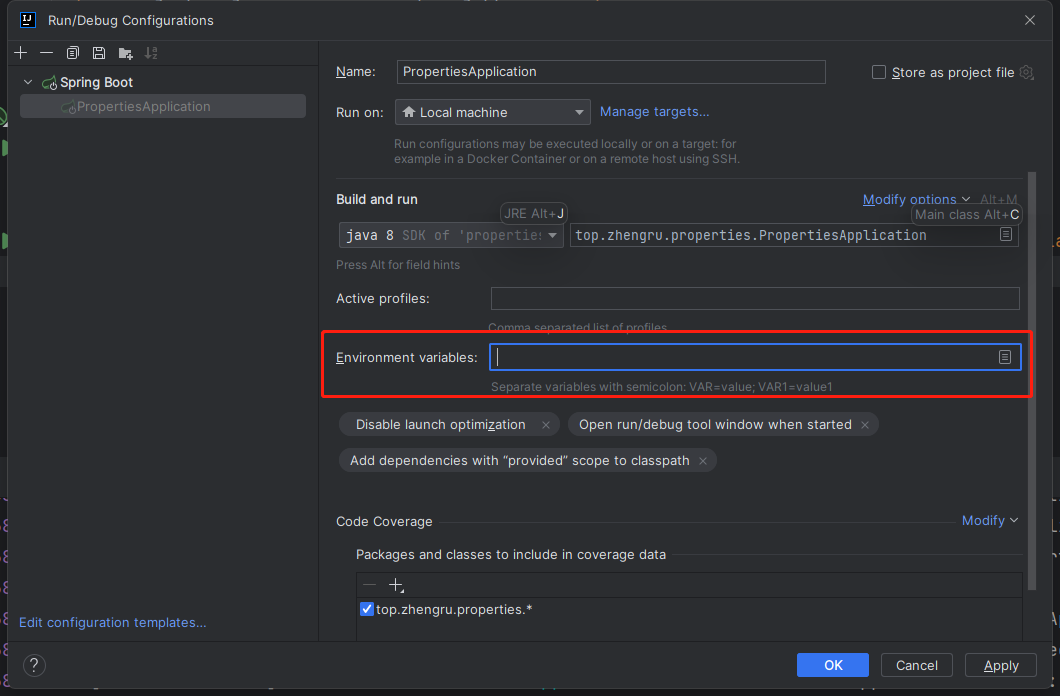
短命令行参数
1
| java -jar properties-0.0.1-SNAPSHOT.jar
|
改端口
1
| java -jar properties-0.0.1-SNAPSHOT.jar --server.port=8081
|
YAML配置
Spring Boot 中的配置文件有两种格式,properties(默认)或者 yaml(yml也可)
属性注入
英文冒号后面需要加一个空格!
注意数组对象注入的形式
1
2
3
4
5
6
7
8
9
10
11
| book:
name: 三国演义
tags:
- 历史
- 小说
- 明代
authors:
- name: 罗贯中
age: 88
- name: 施耐庵
age: 99
|
Profile问题
生产环境切换
1
2
3
| spring.profiles.active=dev
spring.profiles.active=prod
spring.profiles.active=test
|
日志配置
SpringBoot默认的日志实现是Logback
详细配置可以看松哥的这篇文章 点此跳转
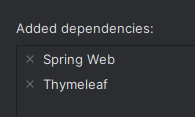
SpingBoot+Thymeleaf
松哥的文章 点此跳转
与传统Java模板引擎不同的是,Thymeleaf支持HTML原型
实践
创建项目时就可以添加依赖
1
2
3
4
5
6
7
8
9
10
11
12
13
14
15
16
17
18
19
20
21
|
spring.thymeleaf.cache=true
spring.thymeleaf.check-template=true
spring.thymeleaf.check-template-location=true
spring.thymeleaf.content-type=text/html
spring.thymeleaf.enabled=true
spring.thymeleaf.encoding=UTF-8
spring.thymeleaf.excluded-view-names=
spring.thymeleaf.mode=HTML5
spring.thymeleaf.prefix=classpath:/templates/
spring.thymeleaf.suffix=.html
|
写一个UserController
1
2
3
4
5
6
7
8
9
10
11
12
13
14
15
16
| @Controller
public class UserController {
@GetMapping("/hello")
public String index(Model model){
List<User> users = new ArrayList<>();
for (int i = 0; i < 10; i++) {
User u = new User();
u.setId(i);
u.setUsername("zhengru:"+i);
u.setAddress("zhengru.top:"+i);
users.add(u);
}
model.addAttribute("users",users);
return "hello";
}
}
|
在template目录下创建hello.html
1
2
3
4
5
6
7
8
9
10
11
12
13
14
15
16
| <!DOCTYPE html>
<html lang="en">
<head>
<meta charset="UTF-8">
<title>Title</title>
</head>
<body>
<table border="1">
<tr th:each = "u : ${users}">
<td th:text = "${u.id}"></td>
<td th:text = "${u.username}"></td>
<td th:text = "${u.address}"></td>
</tr>
</table>
</body>
</html>
|
手动渲染
1
2
3
4
5
6
7
8
9
10
11
12
13
14
| @SpringBootTest
class ThymeleafApplicationTests {
@Autowired
TemplateEngine templateEngine;
@Test
void contextLoads() {
Context ctx = new Context();
ctx.setVariable("username","邹川瑞");
ctx.setVariable("position","Java高级开发工程师");
ctx.setVariable("salary","600000");
String mail = templateEngine.process("mail", ctx);
System.out.println(mail);
}
}
|
表达式语法
说一下${}、*{}、#{}、@{}
${}
普通引用
*{}
可以实现以下操作
1
2
3
4
5
| <div th:object="${user}">
<div th:text="*{username}"></div>
<div th:text="*{address}"></div>
<div th:text="*{id}"></div>
</div>
|
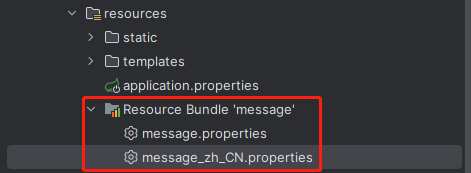
#{}
一般用于国际化
1
| <div th:text="#{hello}"></div>
|
@{}
1
2
3
4
5
| <script th:src="@{https://localhost:8080/hello.js}"></script>
<script th:src="@{~/hello.js}"></script>
<script th:src="@{//localhost:8080/hello.js}"></script>
<script th:src="@{//localhost:8080/hello.js(name='zhengru',age=99)}"></script>
<script th:src="@{/hello.js}"></script>
|
字面量
- 文本字面量:’one text’, ‘Another one!’,…
- 数字字面量:0, 34, 3.0, 12.3,…
- 布尔字面量:true, false
- Null字面量:null
- 字面量标记:one, sometext, main,…
如果文本是英文,并且不包含空格、逗号等字符,可以不用加单引号
文本运算
如果字符串中包含变量,也可以使用另一种简单的方式,叫做字面量置换,用 | 代替 '...' + '...',如下:
th:with 定义了一个局部变量 age,在其所在的 div 中可以使用该局部变量
布尔运算
- 二元运算符:and, or
- 布尔非(一元运算符):!, not
比较和相等
表达式里的值可以使用 >, <, >= 和 <= 符号比较。== 和 != 运算符用于检查相等(或者不相等)。注意 XML规定 < 和 > 标签不能用于属性值,所以应当把它们转义为 < 和 >
如果不想转义,也可以使用别名:gt (>);lt (<);ge (>=);le (<=);not (!)。还有 eq (==), neq/ne (!=)
条件运算符
类似于我们 Java 中的三目运算符
内置对象
基本内置对象:
- #ctx:上下文对象。
- #vars: 上下文变量。
- #locale:上下文区域设置。
- #request:(仅在 Web 上下文中)HttpServletRequest 对象。
- #response:(仅在 Web 上下文中)HttpServletResponse 对象。
- #session:(仅在 Web 上下文中)HttpSession 对象。
- #servletContext:(仅在 Web 上下文中)ServletContext 对象。
实用内置对象:
- #execInfo:有关正在处理的模板的信息。
- #messages:在变量表达式中获取外部化消息的方法,与使用#{…}语法获得的方式相同。
- #uris:转义URL / URI部分的方法
- #conversions:执行配置的转换服务(如果有)的方法。
- #dates:java.util.Date对象的方法:格式化,组件提取等
- #calendars:类似于#dates但是java.util.Calendar对象。
- #numbers:用于格式化数字对象的方法。
- #strings:String对象的方法:contains,startsWith,prepending / appending等
- #objects:一般对象的方法。
- #bools:布尔评估的方法。
- #arrays:数组方法。
- #lists:列表的方法。
- #sets:集合的方法。
- #maps:地图方法。
- #aggregates:在数组或集合上创建聚合的方法。
- #ids:处理可能重复的id属性的方法(例如,作为迭代的结果)。
设置属性值
1
| <img th:attr="src=@{/1.png},title=${user.username},alt=${user.username}">
|
1
| <img src="/myapp/1.png" title="javaboy" alt="javaboy">
|
1
| <img th:src="@{/1.png}" th:alt="${user.username}" th:title="${user.username}">
|
1
| <img th:src="@{/1.png}" th:alt-title="${user.username}">
|
遍历
1
2
3
4
5
6
| <table border="1">
<tr th:each="u : ${users}">
<td th:text="${u.username}"></td>
<td th:text="${u.address}"></td>
</tr>
</table>
|
还有很多细节可以看松哥的文章
分支语句
th:if
th:unless
th:switch…
本地变量
这个我们前面已经涉及到了,使用 th:with 可以定义一个本地变量
内联
1
| <div>hello [[${user.username}]]</div>
|
[[...]] 对应于 th:text (结果会是转义的 HTML)
[(...)]对应于 th:text,它不会执行任何的 HTML 转义
1
2
3
4
| <div th:with="str='hello <strong>javaboy</strong>'">
<div>[[${str}]]</div>
<div>[(${str})]</div>
</div>
|
显示效果

详细看松哥的文章 点此跳转
SpingBoot+Freemarker
文章地址 点此跳转
FreeMarkerProperties中则配置了Freemarker的基本信息,例如模板位置在 classpath:/templates/ ,再例如模板后缀为 .ftl,那么这些配置我们以后都可以在application.properties中进行修改
Json
SpringMVC框架中已经自动配置了jackson和gson的HTTPMessageConverter
只需要添加依赖就能使用
序列化:对象 -> JSON(响应JSON)
反序列化:JSON -> 对象(请求参数是JSON)
Jackson
指定属性序列化/反序列化时的名称
1
2
| @JsonProperty("name")
private String username;
|
忽略字段
忽略某一个字段
1
2
| @JsonIgnore
private Integer id;
|
忽略某些字段
1
2
3
4
5
6
| @JsonIgnoreProperties({"id","username"})
public class User {
private Integer id;
private String username;
private String address;
}
|
日期格式化
局部配置
1
2
| @JsonFormat(pattern = "yyyy-MM-dd HH:mm:ss", timezone = "Asia/Shanghai")
private Date birthday;
|
全局配置
1
2
3
4
5
6
7
8
9
| @Configuration
public class WebMvcConfig {
@Bean
ObjectMapper ObjectMapper(){
ObjectMapper om = new ObjectMapper();
om.setDateFormat(new SimpleDateFormat("yyyy-MM-dd HH:mm:ss"));
return om;
}
}
|
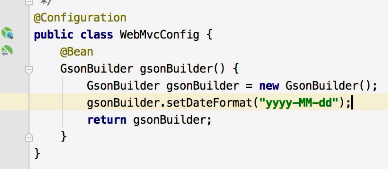
Gson
就放两个图因为我也没试过
一个是application.properties
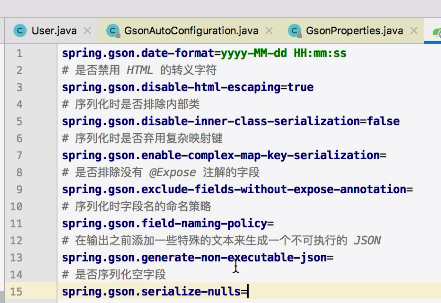
另一个是WebMvcConfig
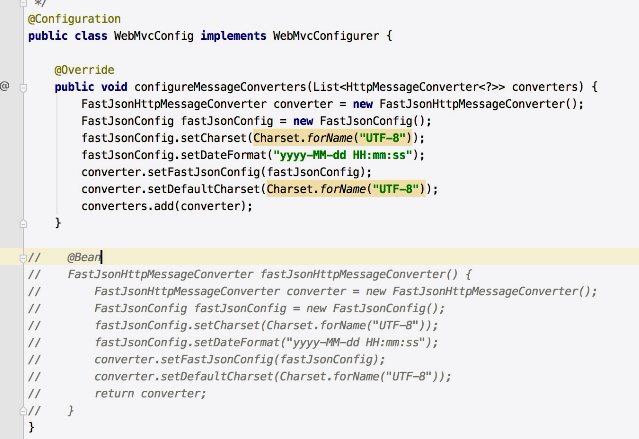
FastJson
需要自己配,可以在方法中或者是自己配一个bean
静态资源
一共有五个位置可以放置静态资源(优先级)
classpath:/META-INF/resources/classpath:/resources/classpath:/static/classpath:/public//
第五个用的比较少
自定义配置
application.properties
第一行配置表示定义资源位置,第二行配置表示定义请求 URL 规则
1
2
| spring.web.resources.static-locations=classpath:/
spring.mvc.static-path-pattern=/**
|
Java代码定义
这里按照我的理解就是在用addResourceHandler映射实际资源的位置也就是addResourceLocations
我可以通过/123/01.html来访问/zhengru/01.html这个资源
1
2
3
4
5
6
7
| @Configuration
public class WebMvcConfig implements WebMvcConfigurer {
@Override
public void addResourceHandlers(ResourceHandlerRegistry registry) {
registry.addResourceHandler("/123/**").addResourceLocations("classpath:/zhengru/");
}
}
|
文件上传
单文件上传
写一个简单的页面
1
2
3
4
| <form action="/upload" method="post" enctype="multipart/form-data">
<input type="file" name="file">
<input type="submit">
</form>
|
写一个controller
1
2
3
4
5
6
7
8
9
10
11
12
13
14
15
16
17
18
19
20
21
22
23
24
| @RestController
public class FileUploadController {
SimpleDateFormat sdf = new SimpleDateFormat("/yyyy/MM/dd/");
@PostMapping("/upload")
public String upload(MultipartFile file, HttpServletRequest req){
String realPath = req.getServletContext().getRealPath("/");
String format = sdf.format(new Date());
String path = realPath + format;
File folder = new File(path);
if (!folder.exists()){
folder.mkdirs();
}
String oldName = file.getOriginalFilename();
String newName = UUID.randomUUID().toString() + oldName.substring(oldName.lastIndexOf("."));
try {
file.transferTo(new File(folder,newName));
String s = req.getScheme() + "://" + req.getServerName() + ":" + req.getServerPort() + format + newName;
return s;
} catch (IOException e) {
e.printStackTrace();
}
return "";
}
}
|
可以在application.properties中配置其他信息
比如限制单个文件的大小和限制所有文件的大小
1
2
| spring.servlet.multipart.max-file-size=1MB
spring.servlet.multipart.max-request-size=10MB
|
多文件上传
合并多文件上传
1
2
3
4
| <form action="/upload2" method="post" enctype="multipart/form-data">
<input type="file" name="files" multiple>
<input type="submit">
</form>
|
部分代码
1
2
3
4
5
6
7
8
9
10
11
| try {
for (MultipartFile file : files) {
String oldName = file.getOriginalFilename();
String newName = UUID.randomUUID().toString() + oldName.substring(oldName.lastIndexOf("."));
file.transferTo(new File(folder,newName));
String s = req.getScheme() + "://" + req.getServerName() + ":" + req.getServerPort() + format + newName;
System.out.println(s);
}
} catch (IOException e) {
e.printStackTrace();
}
|
独立多文件上传
1
2
3
4
5
6
| <form action="/upload3" method="post" enctype="multipart/form-data">
<input type="file" name="file1">
<input type="file" name="file2">
<input type="file" name="file3">
<input type="submit">
</form>
|
1
2
3
| public String upload(MultipartFile file1,MultipartFile file2,MultipartFile file3, HttpServletRequest req){
}
|
Ajax上传
记得引入jQuery
1
2
3
4
5
6
7
8
9
10
11
12
13
14
15
16
17
18
19
20
| <div id="result"></div>
<input type="file" id="file">
<input type="button" value="上传" onclick="uploadFile()">
<script language="JavaScript">
function uploadFile(){
var file = $("#file")[0].files[0];
var formData = new FormData();
formData.append("file",file);
$.ajax({
type:'post',
url:'/upload',
processData:false,
contentType:false,
data:formData,
success:function (msg) {
$("#result").html(msg)
}
})
}
</script>
|
ControllerAdvice注解的使用
全局异常处理
1
2
3
4
5
6
7
8
9
10
|
@RestControllerAdvice
public class MyGlobalException {
@ExceptionHandler(MaxUploadSizeExceededException.class)
public ModelAndView customException(MaxUploadSizeExceededException e) throws IOException {
ModelAndView mv = new ModelAndView("myerror");
mv.addObject("error",e.getMessage());
return mv;
}
}
|
全局数据绑定
ModelAttribute
后面用到了ModelAttribute注解,是MVC里的内容,先学一下
主要有两个作用
- 在数据回显时,给变量定义别名
- 定义全局数据
当用户访问当前Controller中的任意一个方法,在返回数据时,都会将添加了@ModelAttribute注解的方法的返回值,一起返回给前端
定义全局数据
1
2
3
4
5
6
7
8
9
10
| @ControllerAdvice
public class MyGlobalData {
@ModelAttribute("info")
public Map<String,String> mydata(){
Map<String,String> info = new HashMap<>();
info.put("username","dzr");
info.put("address","zhengru.top");
return info;
}
}
|
1
2
3
4
5
6
7
8
9
10
11
12
| @RestController
public class HelloController {
@GetMapping("/hello")
public void hello(Model model){
Map<String,Object> asMap = model.asMap();
Map<String,String> info = (Map<String,String>) asMap.get("info");
Set<String> keySet = info.keySet();
for (String s : keySet) {
System.out.println(s + "————" + info.get(s));
}
}
}
|
全局数据预处理
1
2
3
4
5
6
7
8
9
10
11
12
| @ControllerAdvice
public class MyGlobalData {
@InitBinder("a")
public void a(WebDataBinder binder){
binder.setFieldDefaultPrefix("a.");
}
@InitBinder("b")
public void b(WebDataBinder binder){
binder.setFieldDefaultPrefix("b.");
}
}
|
1
2
3
4
5
6
7
8
| @RestController
public class BookController {
@PostMapping("/book")
public void addBook(@ModelAttribute("b") Book book,@ModelAttribute("a") Author author){
System.out.println(book);
System.out.println(author);
}
}
|
关于异常
异常页面定义
404问题自动寻找异常页面的优先级,其他同理
- templates/error/404.html
- static/error/404.html
- templates/error/4xx.html
- static/error/4xx.html
使用动态显示异常
1
2
3
4
5
6
7
8
9
10
11
12
13
14
15
16
17
18
19
20
21
22
| <table border="1px">
<tr>
<td>path</td>
<td th:text="${path}"></td>
</tr>
<tr>
<td>error</td>
<td th:text="${error}"></td>
</tr>
<tr>
<td>message</td>
<td th:text="${message}"></td>
</tr>
<tr>
<td>timestamp</td>
<td th:text="${timestamp}"></td>
</tr>
<tr>
<td>status</td>
<td th:text="${status}"></td>
</tr>
</table>
|
自定义异常
1
2
3
4
5
6
7
8
9
10
11
| @Component
public class MyErrorAtributes extends DefaultErrorAttributes {
@Override
public Map<String, Object> getErrorAttributes(WebRequest webRequest, ErrorAttributeOptions options) {
Map<String, Object> map = super.getErrorAttributes(webRequest, options);
if ((Integer) map.get("status") == 404){
map.put("message","页面不存在");
}
return map;
}
}
|
跨域问题
第一种方式可以使用@CrossOrigin注解来让某一个类或某一个方法接收某个域的请求
1
| @CrossOrigin(value = "http://localhost:8081/",maxAge = 1800)
|
第二种方式可以使用全局配置来一次性解决
1
2
3
4
5
6
7
8
9
10
11
12
13
14
15
16
17
18
19
20
| @Configuration
public class WebMvcConfig implements WebMvcConfigurer {
@Bean
CorsFilter corsFilter(){
UrlBasedCorsConfigurationSource source = new UrlBasedCorsConfigurationSource();
CorsConfiguration cfg = new CorsConfiguration();
cfg.addAllowedOrigin("http://localhost:8081");
cfg.addAllowedMethod("*");
source.registerCorsConfiguration("/**",cfg);
return new CorsFilter(source);
}
}
|
拦截器
preHandle
postHandle
afterCompletion
1
2
3
4
5
6
7
8
9
10
11
12
13
14
15
16
17
18
19
| public class MyInterceptor implements HandlerInterceptor {
@Override
public boolean preHandle(HttpServletRequest request, HttpServletResponse response, Object handler) throws Exception {
System.out.println("preHandle");
return true;
}
@Override
public void postHandle(HttpServletRequest request, HttpServletResponse response, Object handler, ModelAndView modelAndView) throws Exception {
HandlerInterceptor.super.postHandle(request, response, handler, modelAndView);
System.out.println("postHandle");
}
@Override
public void afterCompletion(HttpServletRequest request, HttpServletResponse response, Object handler, Exception ex) throws Exception {
HandlerInterceptor.super.afterCompletion(request, response, handler, ex);
System.out.println("afterCompletion");
}
}
|
1
2
3
4
5
6
7
8
| @Configuration
public class WebMvcConfig implements WebMvcConfigurer {
@Override
public void addInterceptors(InterceptorRegistry registry) {
registry.addInterceptor(new MyInterceptor()).addPathPatterns("/**")
.excludePathPatterns("/hello");
}
}
|
1
2
3
4
5
6
7
8
9
10
11
| @RestController
public class HelloController {
@GetMapping("/hello")
public String hello(){
return "hello1";
}
@GetMapping("hello2")
public String hello2(){
return "hello2";
}
}
|
系统启动任务
CommandLineRunner
1
2
3
4
5
6
7
8
| @Component
@Order(100)
public class MyCommandLineRunner01 implements CommandLineRunner {
@Override
public void run(String... args) throws Exception {
System.out.println("args1 = " + Arrays.toString(args));
}
}
|
1
2
3
4
5
6
7
8
| @Component
@Order(99)
public class MyCommandLineRunner02 implements CommandLineRunner {
@Override
public void run(String... args) throws Exception {
System.out.println("args2 = " + Arrays.toString(args));
}
}
|
ApplicationRunner
两个用法差异不大,主要体现在对参数的处理上 ,ApplicationRunner的参数类型更加丰富一些
1
2
3
4
5
6
7
8
9
10
11
12
13
14
15
| @Component
@Order(98)
public class MyApplicationRunner implements ApplicationRunner {
@Override
public void run(ApplicationArguments args) throws Exception {
List<String> nonOptionArgs = args.getNonOptionArgs();
System.out.println("nonOptionArgs = " + nonOptionArgs);
Set<String> optionNames = args.getOptionNames();
for (String optionName : optionNames) {
System.out.println(optionName + "-->" + args.getOptionValues(optionName));
}
String[] sourceArgs = args.getSourceArgs();
System.out.println("sourceArgs = " + Arrays.toString(sourceArgs));
}
}
|
整合Web组件
Servlet
1
2
3
4
5
6
7
8
9
10
11
12
| @WebServlet("/hello")
public class MyServlet extends HttpServlet {
@Override
protected void doGet(HttpServletRequest req, HttpServletResponse resp) throws ServletException, IOException {
System.out.println("MyServlet");
}
@Override
protected void doPost(HttpServletRequest req, HttpServletResponse resp) throws ServletException, IOException {
super.doPost(req, resp);
}
}
|
Filter
1
2
3
4
5
6
7
8
| @WebFilter("/*")
public class MyFilter implements Filter {
@Override
public void doFilter(ServletRequest servletRequest, ServletResponse servletResponse, FilterChain filterChain) throws IOException, ServletException {
System.out.println("MyFilter");
filterChain.doFilter(servletRequest,servletResponse);
}
}
|
Listener
1
2
3
4
5
6
7
8
9
10
11
12
| @WebListener
public class MyListener extends RequestContextListener {
@Override
public void requestInitialized(ServletRequestEvent requestEvent) {
System.out.println("requestInitialized");
}
@Override
public void requestDestroyed(ServletRequestEvent requestEvent) {
System.out.println("requestDestroyed");
}
}
|
扫描
1
2
3
4
5
6
7
| @SpringBootApplication
@ServletComponentScan("top.zhengru.webcomponent")
public class WebcomponentApplication {
public static void main(String[] args) {
SpringApplication.run(WebcomponentApplication.class, args);
}
}
|
注册过滤器
除了用WebFilter和Component注解以外,还可以用Configuration
并且这个方法能够解决无法同时指定拦截路径和优先级的问题
1
2
3
4
5
6
7
8
9
10
11
12
13
14
15
16
17
18
19
| @Configuration
public class FilterConfiguration {
@Bean
FilterRegistrationBean<MyFilter04> filter04FilterRegistrationBean04(){
FilterRegistrationBean<MyFilter04> bean = new FilterRegistrationBean<>();
bean.setOrder(90);
bean.setFilter(new MyFilter04());
bean.setUrlPatterns(Arrays.asList("/*"));
return bean;
}
@Bean
FilterRegistrationBean<MyFilter05> filter05FilterRegistrationBean05(){
FilterRegistrationBean<MyFilter05> bean = new FilterRegistrationBean<>();
bean.setOrder(89);
bean.setFilter(new MyFilter05());
bean.setUrlPatterns(Arrays.asList("/*"));
return bean;
}
}
|
参数类型转换
如果是key/value的形式传入的参数,会使用自定义类型转换器处理(比如下面的MyDateConverter)
如果是传入json则可以使用@RequestBody注解,不需要类型转换器,通过HttpMessageConverter转换为对象
1
2
3
4
5
6
7
8
9
10
11
12
| @RestController
public class UserController {
@PostMapping("/user")
public void addUser(User user){
System.out.println(user);
}
@PostMapping("/user2")
public void addUser2(@RequestBody User user){
System.out.println(user);
}
}
|
1
2
3
4
5
6
7
8
9
10
11
12
13
| @Component
public class MyDateConverter implements Converter<String,Date> {
SimpleDateFormat sdf = new SimpleDateFormat("yyyy-MM-dd");
@Override
public Date convert(String source) {
try {
return sdf.parse(source);
} catch (ParseException e) {
e.printStackTrace();
}
return null;
}
}
|
项目首页和角标
优先找静态然后再找动态
1
2
3
4
5
6
7
| @Configuration
public class WebMvcConfig implements WebMvcConfigurer {
@Override
public void addViewControllers(ViewControllerRegistry registry) {
registry.addViewController("/index").setViewName("index");
}
}
|
角标就在那五个地方放一个favicon.ico即可,不需要其他的配置
AOP
1
2
3
4
5
6
7
8
9
10
11
12
13
14
15
16
17
18
19
20
21
22
23
24
25
26
27
28
29
30
31
32
33
34
35
36
37
38
39
40
| @Component
@Aspect
public class LogAspect {
@Pointcut("execution(* top.zhengru.aop.Service.*.*(..))")
public void pc1(){
}
@Before("pc1()")
public void before(JoinPoint jp){
String name = jp.getSignature().getName();
System.out.println(name + "方法开始执行了");
}
@After("pc1()")
public void after(JoinPoint jp){
String name = jp.getSignature().getName();
System.out.println(name + "方法结束了");
}
@AfterReturning(value = "pc1()",returning = "s")
public void afterReturning(JoinPoint jp,String s){
String name = jp.getSignature().getName();
System.out.println(name + "方法返回值是 " + s);
}
@AfterThrowing(value = "pc1()",throwing = "e")
public void afterThrowing(JoinPoint jp,Exception e){
String name = jp.getSignature().getName();
System.out.println(name + "方法抛出了异常 " + e);
}
@Around("pc1()")
public Object around(ProceedingJoinPoint pjp){
try {
Object proceed = pjp.proceed();
} catch (Throwable e) {
e.printStackTrace();
}
return null;
}
}
|
JdbcTemplate
用GeneratedKeyHolder来获取主键
1
2
3
4
5
6
7
8
9
10
11
12
13
14
15
16
17
18
19
20
21
22
23
24
25
26
27
28
29
30
31
32
33
34
35
36
37
38
39
40
41
42
| @Service
public class UserService {
@Autowired
JdbcTemplate jdbcTemplate;
public int addUser(User user){
int result = jdbcTemplate.update("insert into user (username,address) values (?,?)",user.getUsername(),user.getAddress());
return result;
}
public int addUser2(User user){
GeneratedKeyHolder keyHolder = new GeneratedKeyHolder();
int res = jdbcTemplate.update(new PreparedStatementCreator() {
@Override
public PreparedStatement createPreparedStatement(Connection con) throws SQLException {
PreparedStatement ps = con.prepareStatement("insert into user (username,address) values (?,?)", Statement.RETURN_GENERATED_KEYS);
ps.setString(1,user.getUsername());
ps.setString(2,user.getAddress());
return ps;
}
},keyHolder);
user.setId(keyHolder.getKey().longValue());
return res;
}
public List<User> getAllUser(){
List<User> list = jdbcTemplate.query("select * from user", new RowMapper<User>() {
@Override
public User mapRow(ResultSet rs, int rowNum) throws SQLException {
String username = rs.getString("username");
String address = rs.getString("address");
long id = rs.getLong("id");
User user = new User();
user.setId(id);
user.setUsername(username);
user.setAddress(address);
return user;
}
});
return list;
}
}
|
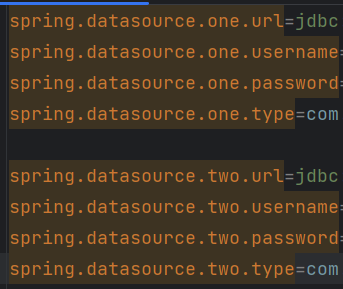
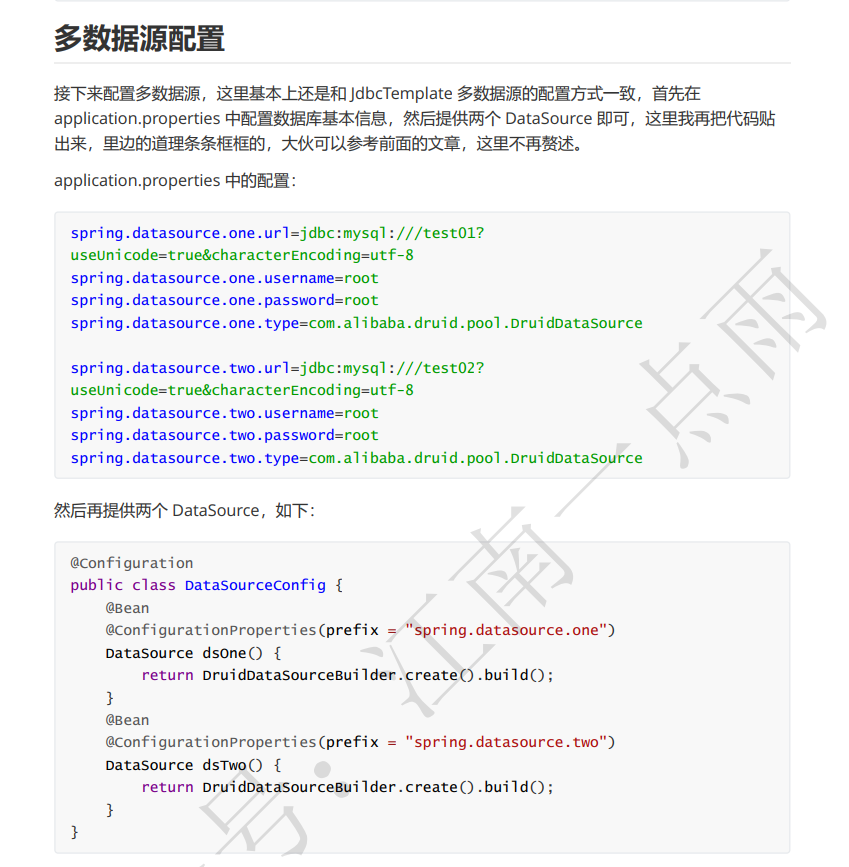
配置多数据源
1
2
3
4
5
6
7
8
9
10
11
12
13
14
| @Configuration
public class DataSourceConfig {
@Bean
@ConfigurationProperties(prefix = "spring.datasource.one")
DataSource dsOne() {
return DruidDataSourceBuilder.create().build();
}
@Bean
@ConfigurationProperties(prefix = "spring.datasource.two")
DataSource dsTwo() {
return DruidDataSourceBuilder.create().build();
}
}
|
1
2
3
4
5
6
7
8
9
10
11
12
| @Configuration
public class JdbcTemplateConfig {
@Bean
JdbcTemplate jdbcTemplateOne(@Qualifier("dsOne") DataSource dsOne) {
return new JdbcTemplate(dsOne);
}
@Bean
JdbcTemplate jdbcTemplateTwo(@Qualifier("dsTwo") DataSource dsTwo) {
return new JdbcTemplate(dsTwo);
}
}
|
MyBatis
可以在MybatisApplication前面加上@MapperScan注解全局配置扫描Mapper
其他的地方都差不多
1
2
| @Autowired
UserMapper userMapper;
|
用XML的话可以在application.properties中配置mapper文件的目录
1
2
|
mybatis.mapper-locations=classpath:mappers/*xml
|
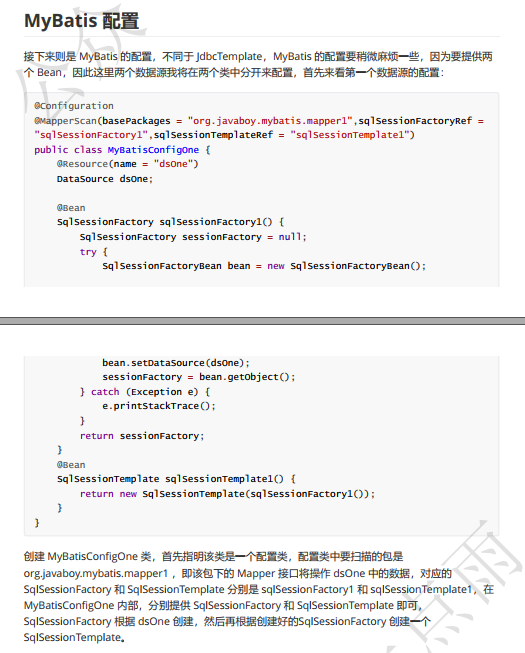
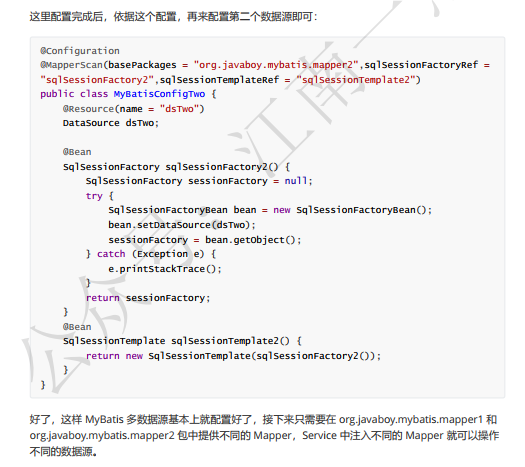
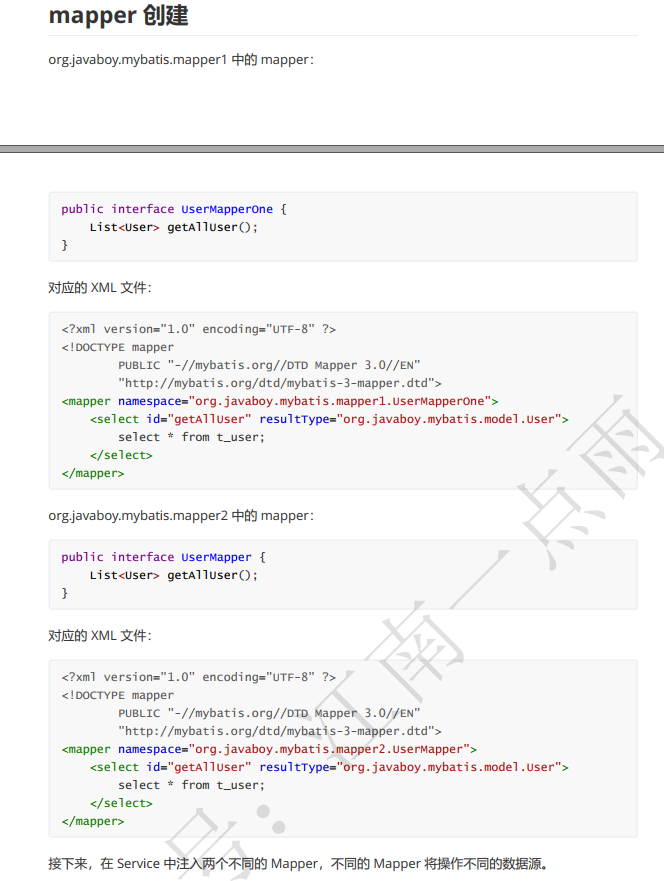
配置多数据源
有点麻烦,下面是松哥的pdf截图
Redis
redis还没学就先简单看了一下
1
2
3
4
5
6
7
8
9
10
11
12
13
14
15
16
17
18
19
20
21
22
23
24
25
26
27
| @SpringBootTest
class RedisApplicationTests {
@Autowired
RedisTemplate redisTemplate;
@Autowired
StringRedisTemplate stringRedisTemplate;
@Test
void contextLoads() {
User user = new User();
user.setUsername("dzr");
user.setAddress("zhengru.top");
ValueOperations ops = redisTemplate.opsForValue();
ops.set("u",user);
User u = (User) ops.get("u");
System.out.println(u);
}
@Test
void test1(){
ValueOperations<String, String> ops = stringRedisTemplate.opsForValue();
ops.set("dzr","zhengru.top");
String dzr = ops.get("dzr");
System.out.println("dzr = " + dzr);
}
}
|
Session共享
分别在8080和8081端口开启服务,发现8081可以共享8080的session,因为Spring Session就是使用 Spring 中的代理过滤器,将所有的 Session 操作拦截下来,自动的将数据 同步到 Redis 中,或者自动的从 Redis 中读取数据
1
2
3
4
5
6
7
8
9
10
11
12
13
14
15
16
17
| @RestController
public class HelloController {
@Value("${server.port}")
Integer port;
@GetMapping("/set")
public String set(HttpSession session){
session.setAttribute("dzr","zhengru.top");
return String.valueOf(port);
}
@GetMapping("/get")
public String get(HttpSession session){
String dzr = (String) session.getAttribute("dzr");
return dzr + ":" + port;
}
}
|
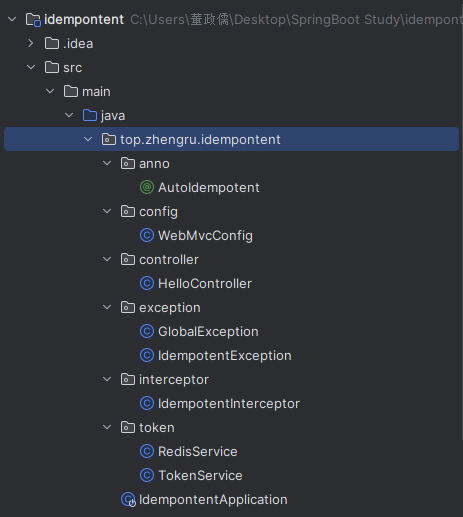
Redis处理接口幂等性
通过拦截器,检测有没有@AutoIdempotent注解,如果有则checkToken,redis中没有token就返回token不存在,相应的,如果先前已经生成了token,就返回hello
这里放出核心的部分
1
2
3
4
5
6
7
8
9
10
11
12
13
14
15
16
17
18
19
20
21
22
23
24
25
26
27
28
29
| @Service
public class RedisService {
@Autowired
StringRedisTemplate stringRedisTemplate;
public boolean setEx(String key,String value,Long expireTime){
boolean result = false;
try {
ValueOperations<String, String> ops = stringRedisTemplate.opsForValue();
ops.set(key,value);
stringRedisTemplate.expire(key,expireTime, TimeUnit.SECONDS);
result = true;
} catch (Exception e){
e.printStackTrace();
}
return result;
}
public boolean exists(String key){
return stringRedisTemplate.hasKey(key);
}
public boolean remove(String key){
if (exists(key)){
return stringRedisTemplate.delete(key);
}
return false;
}
}
|
1
2
3
4
5
6
7
8
9
10
11
12
13
14
15
16
17
18
19
20
21
22
23
24
25
26
27
28
29
| public class TokenService {
@Autowired
RedisService redisService;
public String createToken(){
String uuid = UUID.randomUUID().toString();
redisService.setEx(uuid,uuid,10000L);
return uuid;
}
public boolean checkToken(HttpServletRequest request) throws IdempotentException {
String token = request.getHeader("token");
if (StringUtils.isEmpty(token)){
token = request.getParameter("token");
if (StringUtils.isEmpty(token)){
throw new IdempotentException("Token不存在");
}
}
if (!redisService.exists(token)){
throw new IdempotentException("重复操作");
}
boolean remove = redisService.remove(token);
if (!remove) {
throw new IdempotentException("重复操作");
}
return true;
}
}
|
1
2
3
4
5
6
7
8
9
10
11
12
13
14
15
16
17
18
19
20
21
| @Component
public class IdempotentInterceptor implements HandlerInterceptor {
@Autowired
TokenService tokenService;
@Override
public boolean preHandle(HttpServletRequest request, HttpServletResponse response, Object handler) throws Exception {
if (!(handler instanceof HandlerMethod)){
return true;
}
Method method = ((HandlerMethod) handler).getMethod();
AutoIdempotent idempotent = method.getAnnotation(AutoIdempotent.class);
if (idempotent != null) {
try {
return tokenService.checkToken(request);
} catch (IdempotentException e){
throw e;
}
}
return true;
}
}
|
RESTful
在SpringBoot中构建RESTful非常容易
用法
查询
get
http://localhost:8080/users/1
添加
post/json添加数据
http://localhost:8080/users
修改
put/json
http://localhost:8080/users/8
分页查询
http://localhost:8080/users?page=0&size=3&sort=id,desc
实现
1
2
3
4
5
6
7
8
9
| @Entity
public class User {
@Id
@GeneratedValue(strategy = GenerationType.IDENTITY)
private Long id;
private String username;
private String address;
}
|
1
2
| public interface UserDao extends JpaRepository<User,Long> {
}
|
Spring Cache
1
2
3
4
5
6
7
8
9
| @SpringBootApplication
@EnableCaching
public class CacheApplication {
public static void main(String[] args) {
SpringApplication.run(CacheApplication.class, args);
}
}
|
@CacheConfig
这个注解在类上使用,用来描述该类中所有方法使用的缓存名称,当然也可以不使用该注解,直接在具体的缓存注解上配置名称
1
2
3
4
| @Service
@CacheConfig(cacheNames = "c1")
public class UserService {
}
|
@Cacheable
这个注解一般加在查询方法上,表示将一个方法的返回值缓存起来,默认情况下,缓存的key就是方法的参数,缓存的value就是方法的返回值
1
2
3
4
5
| @Cacheable(key = "#id")
public User getUserById(Integer id,String username) {
System.out.println("getUserById");
return getUserFromDBById(id);
}
|
@CachePut
这个注解一般加在更新方法上,当数据库中的数据更新后,缓存中的数据也要跟着更新,使用该注解,可以将方法的返回值自动更新到已经存在的key上
1
2
3
4
| @CachePut(key = "#user.id")
public User updateUserById(User user) {
return user;
}
|
@CacheEvict
这个注解一般加在删除方法上,当数据库中的数据删除后,相关的缓存数据也要自动清除,该注解在使用的时候也可以配置按照某种条件删除(condition属性)或者或者配置清除所有缓存(allEntries属性)
1
2
3
4
| @CacheEvict()
public void deleteUserById(Integer id) {
}
|
SpringSecurity
这里的安全内容准备单独写一篇,所以先跳过了
WebSocket
下面是使用WebSocket实现的一个聊天室(多人)
1
2
3
4
5
6
7
8
9
10
11
12
13
| @Configuration
@EnableWebSocketMessageBroker
public class WebSocketConfig implements WebSocketMessageBrokerConfigurer {
@Override
public void registerStompEndpoints(StompEndpointRegistry registry) {
registry.addEndpoint("/chat").withSockJS();
}
@Override
public void configureMessageBroker(MessageBrokerRegistry registry) {
registry.enableSimpleBroker("/topic");
}
}
|
1
2
3
4
5
6
7
8
9
| @Controller
public class GreetingController {
@MessageMapping("/hello")
@SendTo("/topic/greetings")
public Message greeting(Message message){
return message;
}
}
|
1
2
3
4
5
6
7
8
9
10
11
12
13
14
15
16
17
18
19
20
21
22
23
24
25
26
27
28
29
30
31
32
33
34
35
36
37
38
39
40
41
42
43
44
45
46
47
48
49
50
51
52
53
54
55
56
57
| <!DOCTYPE html>
<html lang="en">
<head>
<meta charset="UTF-8">
<title>Title</title>
<script src="/webjars/jquery/3.5.1/dist/jquery.min.js"></script>
<script src="/webjars/sockjs-client/1.1.2/sockjs.min.js"></script>
<script src="/webjars/stomp-websocket/2.3.3/stomp.min.js"></script>
</head>
<body>
<div>
<label for="username">请输入用户名:</label>
<input type="text" id="username" placeholder="用户名">
</div>
<div>
<input type="button" value="连接" id="connect">
<input type="button" value="断开连接" id="disconnect" disabled="disabled">
</div>
<div id="chat">
</div>
<div>
<label for="content">请输入聊天内容:</label>
<input type="text" id="content" placeholder="聊天内容">
</div>
<button id="send">发送</button>
<script>
var stompClient;
$(function (){
$("#connect").click(function (){
connect();
$("#send").click(function (){
stompClient.send("/hello",{},JSON.stringify({'name':$("#username").val(),'content':$("#content").val()}))
})
})
})
function connect(){
if (!$("#username").val()){
return;
}
var soketjs = new SockJS("/chat");
stompClient = Stomp.over(soketjs);
stompClient.connect({},function (frame){
setConnect(true)
stompClient.subscribe("/topic/greetings",function (greeting){
var msgContent = JSON.parse(greeting.body);
$("#chat").append("<div>" + msgContent.name + ":" + msgContent.content + "</div>")
})
})
}
function setConnect(connected){
$("#connect").prop("disabled",connected);
$("#disconnect").prop("disabled",!connected)
}
</script>
</body>
</html>
|
ActiveMQ
1
2
3
4
| spring.activemq.broker-url=tcp://127.0.0.1:61616
spring.activemq.packages.trust-all=true
spring.activemq.user=admin
spring.activemq.password=admin
|
1
2
3
4
5
6
7
8
9
10
11
12
13
| @SpringBootApplication
public class JmsApplication {
public static void main(String[] args) {
SpringApplication.run(JmsApplication.class, args);
}
@Bean
Queue queue(){
return new ActiveMQQueue("dzr-queue");
}
}
|
1
2
3
4
5
6
7
8
9
10
11
12
13
14
15
16
| @Component
public class JmsComponent {
@Autowired
JmsMessagingTemplate jmsMessagingTemplate;
@Autowired
Queue queue;
public void send(Message message){
jmsMessagingTemplate.convertAndSend(this.queue,message);
}
@JmsListener(destination = "dzr-queue")
public void receive(Message msg){
System.out.println("msg = " + msg);
}
}
|
1
2
3
4
5
6
7
8
9
10
11
12
13
14
| @SpringBootTest
class JmsApplicationTests {
@Autowired
JmsComponent jmsComponent;
@Test
void contextLoads() {
Message message = new Message();
message.setContent("hello dzr");
message.setDate(new Date());
jmsComponent.send(message);
}
}
|
RabbitMQ
Direct模式
这里注释的部分可以省略
1
2
3
4
5
6
7
8
9
10
11
12
13
14
15
16
17
| @Configuration
public class DirectConfig {
@Bean
Queue directQueue(){
return new Queue("dzr-queue");
}
}
|
1
2
3
4
5
6
7
| @Component
public class DirectReceiver {
@RabbitListener(queues = "dzr-queue")
public void handler(String msg){
System.out.println("msg = " + msg);
}
}
|
1
2
3
4
| @Test
void contextLoads() {
rabbitTemplate.convertAndSend("dzr-queue","hello,dzr!");
}
|
Fanout模式
1
2
3
4
5
6
7
8
9
10
11
12
13
14
15
16
17
18
19
20
21
22
23
24
25
26
27
28
| @Configuration
public class FanoutConfig {
@Bean
Queue queueOne(){
return new Queue("queue-one");
}
@Bean
Queue queueTwo(){
return new Queue("queue-two");
}
@Bean
FanoutExchange fanoutExchange(){
return new FanoutExchange("dzr",true,false);
}
@Bean
Binding bindingOne(){
return BindingBuilder.bind(queueOne()).to(fanoutExchange());
}
@Bean
Binding bindingTwo(){
return BindingBuilder.bind(queueTwo()).to(fanoutExchange());
}
}
|
1
2
3
4
5
6
7
8
9
10
11
12
13
| @Component
public class FaoutReceiver {
@RabbitListener(queues = "queue-one")
public void handler1(String msg){
System.out.println("msg = " + msg);
}
@RabbitListener(queues = "queue-two")
public void handler2(String msg){
System.out.println("msg = " + msg);
}
}
|
1
2
3
4
| @Test
void contextLoads() {
rabbitTemplate.convertAndSend("dzr-fanout",null,"hello dzr!");
}
|
Topic模式
1
2
3
4
5
6
7
8
9
10
11
12
13
14
15
16
17
18
19
20
21
22
23
24
25
26
27
28
29
30
31
32
33
34
35
36
| @Configuration
public class TopicConfig {
@Bean
Queue xiaomi(){
return new Queue("xiaomi");
}
@Bean
Queue huawei(){
return new Queue("huawei");
}
@Bean
Queue phone(){
return new Queue("phone");
}
@Bean
TopicExchange topicExchange(){
return new TopicExchange("dzr-topic",true,false);
}
@Bean
Binding xiaomiBinding(){
return BindingBuilder.bind(xiaomi()).to(topicExchange()).with("xiaomi.#");
}
@Bean
Binding huaweiBinding(){
return BindingBuilder.bind(huawei()).to(topicExchange()).with("huawei.#");
}
@Bean
Binding phoneBinding(){
return BindingBuilder.bind(phone()).to(topicExchange()).with("#.phone.#");
}
}
|
1
2
3
4
5
6
7
8
9
10
11
12
13
14
15
16
17
| @Component
public class TopicReceiver {
@RabbitListener(queues = "phone")
public void handler1(String msg){
System.out.println("msg:phone = " + msg);
}
@RabbitListener(queues = "xiaomi")
public void handler2(String msg){
System.out.println("msg:xiaomi = " + msg);
}
@RabbitListener(queues = "huawei")
public void handler3(String msg){
System.out.println("msg:huawei = " + msg);
}
}
|
1
2
3
4
5
6
| @Test
void contextLoads() {
rabbitTemplate.convertAndSend("dzr-topic","xiaomi.news","小米新闻");
rabbitTemplate.convertAndSend("dzr-topic","xiaomi.phone","小米手机");
rabbitTemplate.convertAndSend("dzr-topic","huawei.phone","华为手机");
}
|
用的比较少,节约篇幅就不放代码了
Mail
下面的username就是发件人邮箱,password即POP3/SMTP协议的授权码(不是邮箱密码!)
1
2
3
4
5
6
7
| spring.mail.host=smtp.163.com
spring.mail.port=25
spring.mail.username=***
spring.mail.password=***
spring.mail.default-encoding=UTF-8
spring.mail.properties.mail.smtp.socketFactory.class=javax.net.ssl.SSLSocketFactory
spring.mail.properties.mail.debug=true
|
contextLoads是普通邮件,test1是附件邮件,test2是图片资源邮件,test3是发送freemaker模板
1
2
3
4
5
6
7
8
9
10
11
12
13
14
15
16
17
18
19
20
21
22
23
24
25
26
27
28
29
30
31
32
33
34
35
36
37
38
39
40
41
42
43
44
45
46
47
48
49
50
51
52
53
54
55
56
57
58
59
60
61
62
63
64
65
66
67
68
69
70
71
72
73
74
75
76
77
78
79
80
81
82
83
84
85
86
87
88
| package top.zhengru.mail;
import freemarker.core.Configurable;
import freemarker.template.Configuration;
import freemarker.template.Template;
import freemarker.template.TemplateException;
import org.junit.jupiter.api.Test;
import org.springframework.beans.factory.annotation.Autowired;
import org.springframework.boot.test.context.SpringBootTest;
import org.springframework.mail.SimpleMailMessage;
import org.springframework.mail.javamail.JavaMailSender;
import org.springframework.mail.javamail.MimeMessageHelper;
import top.zhengru.mail.model.User;
import javax.mail.MessagingException;
import javax.mail.internet.MimeMessage;
import java.io.File;
import java.io.IOException;
import java.io.StringWriter;
import java.util.Date;
@SpringBootTest
class MailApplicationTests {
@Autowired
JavaMailSender javaMailSender;
@Test
void contextLoads() {
SimpleMailMessage simMsg = new SimpleMailMessage();
simMsg.setFrom("***");
simMsg.setTo("***");
simMsg.setSentDate(new Date());
simMsg.setSubject("邮件主题-测试邮件");
simMsg.setText("邮件内容-测试邮件");
javaMailSender.send(simMsg);
}
@Test
void test1() throws MessagingException {
File file = new File("C:/Users/董政儒/Desktop/头像.jpg");
MimeMessage mimeMessage = javaMailSender.createMimeMessage();
MimeMessageHelper helper = new MimeMessageHelper(mimeMessage, true);
helper.setFrom("***");
helper.setTo("***");
helper.setSentDate(new Date());
helper.setSubject("邮件主题-测试邮件");
helper.setText("邮件内容-测试邮件");
helper.addAttachment(file.getName(),file);
javaMailSender.send(mimeMessage);
}
@Test
void test2() throws MessagingException {
File file = new File("C:/Users/董政儒/Desktop/头像.jpg");
MimeMessage mimeMessage = javaMailSender.createMimeMessage();
MimeMessageHelper helper = new MimeMessageHelper(mimeMessage, true);
helper.setFrom("***");
helper.setTo("***");
helper.setSentDate(new Date());
helper.setSubject("邮件主题-测试邮件");
helper.setText("<div>hello,这是一封带图片资源的邮件...</div><div><img src='cid:p01' /></div>",true);
helper.addInline("p01",file);
javaMailSender.send(mimeMessage);
}
@Test
void test3() throws MessagingException, IOException, TemplateException {
MimeMessage mimeMessage = javaMailSender.createMimeMessage();
MimeMessageHelper helper = new MimeMessageHelper(mimeMessage, true);
helper.setFrom("***");
helper.setTo("***");
helper.setSentDate(new Date());
helper.setSubject("邮件主题-测试邮件");
Configuration cfg = new Configuration(Configuration.getVersion());
cfg.setClassLoaderForTemplateLoading(MailApplicationTests.class.getClassLoader(),"mail");
Template template = cfg.getTemplate("mail.ftl");
User user = new User();
user.setUsername("***");
user.setCompany("***");
user.setPosition("***");
user.setSalary(8000.0);
StringWriter out = new StringWriter();
template.process(user,out);
helper.setText(out.toString(), true);
javaMailSender.send(mimeMessage);
}
}
|
定时任务
@Scheduled
记得在@SpringBootApplication下加@EnableScheduled
fixedDelay
- 控制方法执行的间隔时间,是以上一次方法执行完开始算起,如上一次方法执行阻塞住了,那么直到上一次执行完,并间隔给定的时间后,执行下一次
fixedRate
- 是按照一定的速率执行,是从上一次方法执行开始的时间算起,如果上一次方法阻塞住了,下一次也是不会执行,但是在阻塞这段时间内累计应该执行的次数,当不再阻塞时,一下子把这些全部执行掉,而后再按照固定速率继续执行
initialDelay
- 如:@Scheduled(initialDelay = 10000,fixedRate = 15000,这个定时器就是在上一个的基础上加了一个initialDelay = 10000 意思就是在容器启动后,延迟10秒后再执行一次定时器,以后每15秒再执行一次该定时器
cron
- 表达式可以定制化执行任务,但是执行的方式是与fixedDelay相近的,也是会按照上一次方法结束时间开始算起
1
2
3
4
5
6
7
8
9
10
11
12
13
14
15
16
17
18
19
20
21
22
| @Component
public class MySchedule {
@Scheduled(fixedDelay = 1000)
public void fixedDelay(){
System.out.println("fixedDelay:" + new Date());
}
@Scheduled(fixedRate = 1000)
public void fixedRate(){
System.out.println("fixedRate:" + new Date());
}
@Scheduled(initialDelay = 1000,fixedRate = 1000)
public void initDelay(){
System.out.println("initDelay:" + new Date());
}
@Scheduled(cron = "0/5 * * * * *")
public void cron(){
System.out.println("cron:" + new Date());
}
}
|
@Quartz
1
2
3
4
5
6
| @Component
public class MyJob01 {
public void sayHello(){
System.out.println("MyJob01:" + new Date());
}
}
|
1
2
3
4
5
6
7
8
9
10
11
12
13
| @Component
public class MyJob02 extends QuartzJobBean {
private String name;
public void setName(String name) {
this.name = name;
}
@Override
protected void executeInternal(JobExecutionContext context) throws JobExecutionException {
System.out.println("MyJob02:" + name + ":" + new Date());
}
}
|
1
2
3
4
5
6
7
8
9
10
11
12
13
14
15
16
17
18
19
20
21
22
23
24
25
26
27
28
29
30
31
32
33
34
35
36
37
38
39
40
41
42
43
44
45
| @Configuration
public class QuartzConfig {
@Bean
MethodInvokingJobDetailFactoryBean jobDetail01(){
MethodInvokingJobDetailFactoryBean bean = new MethodInvokingJobDetailFactoryBean();
bean.setTargetBeanName("myJob01");
bean.setTargetMethod("sayHello");
return bean;
}
@Bean
JobDetailFactoryBean jobDetail02(){
JobDetailFactoryBean bean = new JobDetailFactoryBean();
bean.setJobClass(MyJob02.class);
JobDataMap map = new JobDataMap();
map.put("name","dzr");
bean.setJobDataMap(map);
return bean;
}
@Bean
SimpleTriggerFactoryBean simpleTriggerFactoryBean(){
SimpleTriggerFactoryBean bean = new SimpleTriggerFactoryBean();
bean.setJobDetail(jobDetail01().getObject());
bean.setRepeatCount(3);
bean.setStartDelay(1000);
bean.setRepeatInterval(1000);
return bean;
}
@Bean
CronTriggerFactoryBean cronTriggerFactoryBean(){
CronTriggerFactoryBean bean = new CronTriggerFactoryBean();
bean.setJobDetail(jobDetail02().getObject());
bean.setCronExpression("0/5 * * * * ?");
return bean;
}
@Bean
SchedulerFactoryBean schedulerFactoryBean(){
SchedulerFactoryBean bean = new SchedulerFactoryBean();
bean.setTriggers(simpleTriggerFactoryBean().getObject(),cronTriggerFactoryBean().getObject());
return bean;
}
}
|
Swagger
第一次跑的时候报错了,查了一下Swagger3.0不兼容SpringBoot2.6.x及以上的版本,于是就把SpringBoot版本降到了2.5.6
建议还是使用Swagger2.x?
- @ApiIgnore
- @ApiResponses
- @ApiOperation
- @ApiImplicitParams
1
2
3
4
5
6
7
8
9
10
11
12
13
14
15
16
17
18
19
20
21
22
23
24
25
26
27
| @RestController
public class UserController {
@GetMapping("/hello")
@ApiIgnore
public String hello(){
return "hello";
}
@ApiResponses({
@ApiResponse(responseCode = "200",description = "请求成功"),
@ApiResponse(responseCode = "500",description = "请求失败")
})
@GetMapping("/user/{id}")
@ApiOperation(value = "查询用户",notes = "根据id查询用户")
@ApiImplicitParams({
@ApiImplicitParam(paramType = "body",name = "id",value = "用户 id",required = true)
})
public String getUserById(@PathVariable Integer id){
return "user:" + id;
}
@PostMapping("/user")
@Parameter(name = "user")
public String addUser(@RequestBody User user){
return user.toString();
}
}
|
1
2
3
4
5
6
7
8
9
10
| @ApiModel(value = "用户实体类",description = "这个类定义了用户所有的属性")
public class User {
@ApiModelProperty(value = "用户ID")
private Long id;
@ApiModelProperty(value = "用户名")
private String username;
@ApiModelProperty(value = "用户地址")
private String address;
}
|
数据校验
- @Null 被注解的元素必须为 null
- @NotNull 被注解的元素必须不为 null
- @AssertTrue 被注解的元素必须为 true
- @AssertFalse 被注解的元素必须为 false
- @Min(value) 被注解的元素必须是一个数字,其值必须大于等于指定的最小值
- @Max(value) 被注解的元素必须是一个数字,其值必须小于等于指定的最大值
- @DecimalMin(value) 被注解的元素必须是一个数字,其值必须大于等于指定的最小值
- @DecimalMax(value) 被注解的元素必须是一个数字,其值必须小于等于指定的最大值
- @Size(max=, min=) 被注解的元素的大小必须在指定的范围内
- @Digits (integer, fraction) 被注解的元素必须是一个数字,其值必须在可接受的范围内
- @Past 被注解的元素必须是一个过去的日期
- @Future 被注解的元素必须是一个将来的日期
- @Pattern(regex=,flag=) 被注解的元素必须符合指定的正则表达式
- @NotBlank(message =) 验证字符串非 null,且长度必须大于0
- @Email 被注解的元素必须是电子邮箱地址
- @Length(min=,max=) 被注解的字符串的大小必须在指定的范围内
- @NotEmpty 被注解的字符串的必须非空
- @Range(min=,max=,message=) 被注解的元素必须在合适的范围内
普通校验
1
2
3
4
5
6
7
8
| public class User {
private Long id;
@Size(min = 2,max = 5,message = "{user.username.size}")
private String username;
@NotNull
private String address;
}
|
这里的message可以在resource目录下创建一个ValidationMessages.properties文件,在里面定义提示,例如:
1
| user.username.size=username长度介于2-5
|
读取校验结果,BindingResult里如果有信息,即校验失败
1
2
3
4
5
6
7
8
9
10
11
12
13
14
15
| @RestController
public class UserController {
@PostMapping("/user")
public void addUser(@Validated User user, BindingResult result){
if (result != null && result.hasErrors()){
List<ObjectError> allErrors = result.getAllErrors();
for (ObjectError error : allErrors) {
System.out.println("error.getDefaultMessage() = " + error.getDefaultMessage());
}
}else {
System.out.println(user.toString());
}
}
}
|
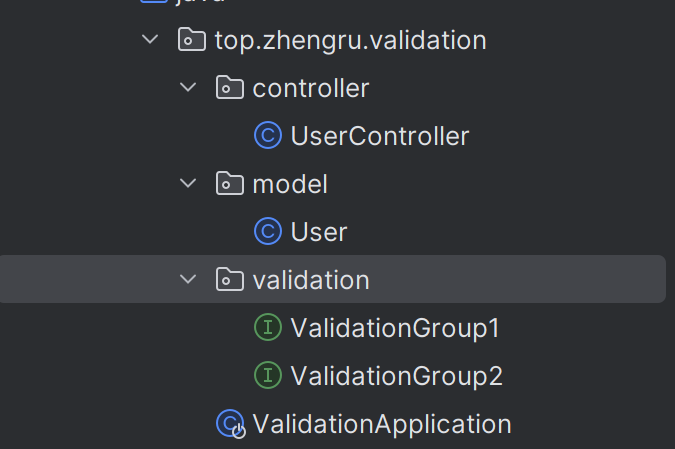
分组校验
创建两个接口然后就可以在校验条件注解里加入group
1
2
3
4
| @Size(min = 2,max = 5,message = "{user.username.size}",groups = {ValidationGroup1.class})
private String username;
@NotNull(groups = {ValidationGroup1.class, ValidationGroup2.class})
private String address;
|
接着就可以在校验注解里加入分组
1
2
3
| public void addUser(@Validated(ValidationGroup1.class) User user, BindingResult result){
}
|
应用监控
先鸽一下…
打包问题
可执行jar和可依赖jar同时存在
1
2
3
4
5
6
7
8
9
10
11
| <build>
<plugins>
<plugin>
<groupId>org.springframework.boot</groupId>
<artifactId>spring-boot-maven-plugin</artifactId>
<configuration>
<classifier>exec</classifier>
</configuration>
</plugin>
</plugins>
</build>
|
暂时就先到这,如果有补充会继续更新