MyBatis学习笔记

版本信息
IntelliJ IDEA:2022.3
Navicat for MySQL:16
MySQL数据库:5.7
MySQL驱动:5.1.48
MyBatis:3.5.10
JDK:Java8/11(从Javassist开始更换为jdk1.8)
junit:4.13.2
logback:1.2.11
servlet-api:4.0.1
MyBatis概述
MyBatis本质上就是对JDBC的封装,通过MyBatis完成CRUD。
MyBatis在三层架构中负责持久层的,属于持久层框架
MyBatis框架特点:
- 支持定制化 SQL、存储过程、基本映射以及高级映射
- 避免了几乎所有的 JDBC 代码中手动设置参数以及获取结果集
- 支持XML开发,也支持注解式开发。【为了保证sql语句的灵活,所以mybatis大部分是采用XML方式开发。】
- 将接口和 Java 的 POJOs(Plain Ordinary Java Object,简单普通的Java对象)映射成数据库中的记录
- 体积小好学:两个jar包,两个XML配置文件。
- 完全做到sql解耦合。
- 提供了基本映射标签。
- 提供了高级映射标签。
- 提供了XML标签,支持动态SQL的编写。
MyBatis下载
Maven依赖代码
<dependency>
  <groupId>org.mybatis</groupId>
  <artifactId>mybatis</artifactId>
  <version>x.x.x</version>
</dependency>
入门程序开发步骤
打包方式
<groupId>com.powernode</groupId>
<artifactId>mybatis-001-introduction</artifactId>
<version>1.0-SNAPSHOT</version>
<packaging>jar</packaging>
引入依赖
<!--mybatis核心依赖-->
<dependency>
  <groupId>org.mybatis</groupId>
  <artifactId>mybatis</artifactId>
  <version>3.5.10</version>
</dependency>
<!--mysql驱动依赖-->
<dependency>
  <groupId>mysql</groupId>
  <artifactId>mysql-connector-java</artifactId>
  <version>5.1.48</version>
</dependency>
配置文件
新建mybatis-config.xml配置文件(可改名)
<?xml version="1.0" encoding="UTF-8" ?>
<!DOCTYPE configuration
        PUBLIC "-//mybatis.org//DTD Config 3.0//EN"
        "http://mybatis.org/dtd/mybatis-3-config.dtd">
<configuration>
    <environments default="development">
        <environment id="development">
            <transactionManager type="JDBC"/>
            <dataSource type="POOLED">
                <property name="driver" value="com.mysql.jdbc.Driver"/>
                <property name="url" value="jdbc:mysql://localhost:3306/mybatis"/>
                <property name="username" value="root"/>
                <property name="password" value="root"/>
            </dataSource>
        </environment>
    </environments>
    <mappers>
        <!--sql映射文件创建好之后,需要将该文件路径配置到这里-->
        <mapper resource=""/>
    </mappers>
</configuration>新建CarMapper.xml配置文件(可改名)
<?xml version="1.0" encoding="UTF-8" ?>
<!DOCTYPE mapper
        PUBLIC "-//mybatis.org//DTD Mapper 3.0//EN"
        "http://mybatis.org/dtd/mybatis-3-mapper.dtd">
<!--namespace先随意写一个-->
<mapper namespace="car">
    <!--insert sql:保存一个汽车信息-->
    <insert id="insertCar">
        insert into t_car
            (id,car_num,brand,guide_price,produce_time,car_type)
        values
            (null,'102','丰田mirai',40.30,'2014-10-05','氢能源')
    </insert>
</mapper>将CarMapper.xml文件路径配置到mybatis-config.xml
<mapper resource="CarMapper.xml"/>编写程序
编写MyBatisIntroductionTest代码
package top.zhengru.mybatis.test;

import org.apache.ibatis.io.Resources;
import org.apache.ibatis.session.SqlSession;
import org.apache.ibatis.session.SqlSessionFactory;
import org.apache.ibatis.session.SqlSessionFactoryBuilder;

import java.io.InputStream;

public class MyBatisConfigFilePath {
    public static void main(String[] args) throws Exception{
        //创建SqlSessionFactoryBuilder对象
        SqlSessionFactoryBuilder sqlSessionFactoryBuilder = new SqlSessionFactoryBuilder();
        //创建SqlSessionFactory对象
        InputStream is = Resources.getResourceAsStream("mybatis-config.xml");
        SqlSessionFactory sqlSessionFactory = sqlSessionFactoryBuilder.build(is);
        //创建SqlSession对象
        SqlSession sqlSession = sqlSessionFactory.openSession();
        //执行sql
        int count = sqlSession.insert("insertCar");
        System.out.println("插入几条数据:" + count);
        sqlSession.commit();
        sqlSession.close();
    }
}
注意
事务默认是不提交的,需要手动提交
事物管理器
可以是JDBC或MANAGED(交给其他容器来负责)
<transactionManager type="JDBC"/>可以手动打开自动提交
SqlSession sqlSession = sqlSessionFactory.openSession(true);比较完整的代码
package top.zhengru.mybatis.test;

import org.apache.ibatis.io.Resources;
import org.apache.ibatis.session.SqlSession;
import org.apache.ibatis.session.SqlSessionFactory;
import org.apache.ibatis.session.SqlSessionFactoryBuilder;

import java.io.IOException;

public class MyBatisCompleteCodeTest {
    public static void main(String[] args) {
        SqlSession sqlSession = null;
        try {
            SqlSessionFactoryBuilder sqlSessionFactoryBuilder = new SqlSessionFactoryBuilder();
            SqlSessionFactory sqlSessionFactory = sqlSessionFactoryBuilder.build(Resources.getResourceAsStream("mybatis-config.xml"));
            sqlSession = sqlSessionFactory.openSession();
            int count = sqlSession.insert("insertCar");
            System.out.println("插入了"+count+"条记录");
            sqlSession.commit();
        } catch (Exception e) {
            if (sqlSession!=null){
                sqlSession.rollback();
            }
            e.printStackTrace();
        } finally {
            if (sqlSession!=null){
                sqlSession.close();
            }
        }
    }
}
引入JUnit
引入依赖
<!-- junit依赖 -->
<dependency>
    <groupId>junit</groupId>
    <artifactId>junit</artifactId>
    <version>4.13.2</version>
    <scope>test</scope>
</dependency>
编写单元测试类
每一个测试方法上使用@Test注解进行标注
public class CarMapperTest{

    // 测试方法
    @Test
    public void testInsert(){}

    @Test
    public void testUpdate(){}

}
引入日志框架logback
启用标准日志组件
应该出现在environments标签之前
<settings>
  <setting name="logImpl" value="STDOUT_LOGGING" />
</settings>配置不够灵活,可以集成其他的日志组件,例如:log4j,logback等

引入logback
引入依赖
<dependency>
  <groupId>ch.qos.logback</groupId>
  <artifactId>logback-classic</artifactId>
  <version>1.2.11</version>
  <scope>test</scope>
</dependency>
引入配置文件
logback.xml或logback-test.xml
<?xml version="1.0" encoding="UTF-8"?>

<configuration debug="false">
    <!-- 控制台输出 -->
    <appender name="STDOUT" class="ch.qos.logback.core.ConsoleAppender">
        <encoder class="ch.qos.logback.classic.encoder.PatternLayoutEncoder">
            <!--格式化输出:%d表示日期,%thread表示线程名,%-5level:级别从左显示5个字符宽度%msg:日志消息,%n是换行符-->
            <pattern>%d{yyyy-MM-dd HH:mm:ss.SSS} [%thread] %-5level %logger{50} - %msg%n</pattern>
        </encoder>
    </appender>
    <!-- 按照每天生成日志文件 -->
    <appender name="FILE" class="ch.qos.logback.core.rolling.RollingFileAppender">
        <rollingPolicy class="ch.qos.logback.core.rolling.TimeBasedRollingPolicy">
            <!--日志文件输出的文件名-->
            <FileNamePattern>${LOG_HOME}/TestWeb.log.%d{yyyy-MM-dd}.log</FileNamePattern>
            <!--日志文件保留天数-->
            <MaxHistory>30</MaxHistory>
        </rollingPolicy>
        <encoder class="ch.qos.logback.classic.encoder.PatternLayoutEncoder">
            <!--格式化输出:%d表示日期,%thread表示线程名,%-5level:级别从左显示5个字符宽度%msg:日志消息,%n是换行符-->
            <pattern>%d{yyyy-MM-dd HH:mm:ss.SSS} [%thread] %-5level %logger{50} - %msg%n</pattern>
        </encoder>
        <!--日志文件最大的大小-->
        <triggeringPolicy class="ch.qos.logback.core.rolling.SizeBasedTriggeringPolicy">
            <MaxFileSize>100MB</MaxFileSize>
        </triggeringPolicy>
    </appender>

    <!--mybatis log configure-->
    <logger name="com.apache.ibatis" level="TRACE"/>
    <logger name="java.sql.Connection" level="DEBUG"/>
    <logger name="java.sql.Statement" level="DEBUG"/>
    <logger name="java.sql.PreparedStatement" level="DEBUG"/>

    <!-- 日志输出级别,logback日志级别包括五个:TRACE < DEBUG < INFO < WARN < ERROR -->
    <root level="DEBUG">
        <appender-ref ref="STDOUT"/>
        <appender-ref ref="FILE"/>
    </root>

</configuration>
封装SqlSessionUtil工具类
package top.zhengru.mybatis.utils;

import org.apache.ibatis.io.Resources;
import org.apache.ibatis.session.SqlSession;
import org.apache.ibatis.session.SqlSessionFactory;
import org.apache.ibatis.session.SqlSessionFactoryBuilder;

import java.io.IOException;

public class SqlSessionUtil {
    private static SqlSessionFactory sqlSessionFactory = null;
    private SqlSessionUtil(){}
    static {
        try {
            sqlSessionFactory = new SqlSessionFactoryBuilder().build(Resources.getResourceAsStream("mybatis-config.xml"));
        } catch (IOException e) {
            throw new RuntimeException(e);
        }
    }
    public static SqlSession openSession(){
        return sqlSessionFactory.openSession();
    }
}
使用MyBatis完成CRUD
增
<insert id="insertCar">
    insert into t_car(id,car_num,brand,guide_price,produce_time,car_type)
    values(#{id},#{carNum},#{brand},#{guidePrice},#{produceTime},#{carType})
</insert>创建一个POJO类,对应相应的数据表,并提供构造方法和get、set方法
@Test
public void testInsertCarByPOJO(){
    SqlSession sqlSession = SqlSessionUtil.openSession();
    Car car = new Car((long)5, "2333", "特斯拉Model3", 24.00, "2023-01-01", "电车");
    sqlSession.insert("insertCar",car);
    sqlSession.commit();
    sqlSession.close();
}
删
跟增的方法基本一致
<delete id="deleteById">
	delete from t_car where id = #{id}
</delete>
注意
当占位符只有一个的时候,${} 里面的内容可以随便写
改
跟上面俩也一样
<update id="updateCarByPOJO">
    update t_car set
    car_num = #{carNum},brand = #{brand},guide_price = #{guidePrice},produce_time = #{produceTime},car_type = #{carType}
    where id = #{id}
</update>
查
查询一条数据
需要注意的是,需要写返回结果的类型,如top.zhengru.mybatis.pojo.Car
并且如果查询字段名和类型内属性名不一样的话,需要用sql使用别名,否则会返回空
<select id="selectCarById" resultType="top.zhengru.mybatis.pojo.Car">
    select id,car_num as carNum,brand,guide_price as guidePrice,produce_time as produceTime,car_type as carType
    from t_car
    where id = #{id}
</select>
@Test
public void testSelectById(){
SqlSession sqlSession = SqlSessionUtil.openSession();
Car car = sqlSession.selectOne("selectCarById", 1);
System.out.println(car.toString());
sqlSession.close();
}查询多条数据
selectList方法用List接收,其他基本一致
<select id="selectCarAll" resultType="top.zhengru.mybatis.pojo.Car">
    select
    id, car_num as carNum, brand, guide_price as guidePrice, produce_time as produceTime, car_type as carType
    from t_car
</select>
@Test
public void testSelectCarAll(){
SqlSession sqlSession = SqlSessionUtil.openSession();
List<Object> cars = sqlSession.selectList("selectCarAll");
cars.forEach(car -> System.out.println(car));
sqlSession.close();
}关于SQL Mapper的namespace
防止sql Id冲突,调用时写namespace.sql Id,如car1.selectCarAll
<mapper namespace="car1">
    <select id="selectCarAll" resultType="top.zhengru.mybatis.pojo.Car">
        select
        id, car_num as carNum, brand, guide_price as guidePrice, produce_time as produceTime, car_type as carType
        from t_car
    </select>
</mapper>
核心配置文件详解
<?xml version="1.0" encoding="UTF-8" ?>
<!DOCTYPE configuration
        PUBLIC "-//mybatis.org//DTD Config 3.0//EN"
        "http://mybatis.org/dtd/mybatis-3-config.dtd">
<configuration>

<!--    <settings>-->
<!--        <setting name="logImpl" value="STDOUT_LOGGING"/>-->
<!--    </settings>-->

    <environments default="development">
        <environment id="development">
            <transactionManager type="JDBC"/>
            <dataSource type="POOLED">
                <property name="driver" value="com.mysql.jdbc.Driver"/>
                <property name="url" value="jdbc:mysql://124.223.44.144:3306/mybatis?useSSL=false"/>
                <property name="username" value="root"/>
                <property name="password" value="dong"/>
            </dataSource>
        </environment>
    </environments>
    <mappers>
        <mapper resource="carMapper.xml"/>
    </mappers>
</configuration>
configuration:根标签
environments:环境(多个)
- default属性:表示默认使用的是哪个环境,default后面填写的是environment的id
environment:具体的环境配置(主要包括:事务管理器的配置 + 数据源的配置)
- id:给当前环境一个唯一标识,该标识用在environments的default后面
transactionManager:配置事务管理器
type属性:指定事务管理器
JDBC:使用JDBC原生的事务管理机制
MANAGED:交给其它容器来管理事务,比如WebLogic、JBOSS等。如果没有管理事务的容器,则没有事务
dataSource:指定数据源
type属性:用来指定具体使用的数据库连接池的策略,可选值包括三个
UNPOOLED:采用传统的获取连接的方式,虽然也实现Javax.sql.DataSource接口,但是并没有使用池的思想
property可以是:
driver 这是 JDBC 驱动的 Java 类全限定名
url 这是数据库的 JDBC URL 地址
username 登录数据库的用户名
password 登录数据库的密码
defaultTransactionIsolationLevel 默认的连接事务隔离级别
defaultNetworkTimeout 等待数据库操作完成的默认网络超时时间(单位:毫秒)
POOLED:采用传统的javax.sql.DataSource规范中的连接池,mybatis中有针对规范的实现
property可以是(除了包含UNPOOLED中之外):
poolMaximumActiveConnections 在任意时间可存在的活动(正在使用)连接数量,默认值:10
poolMaximumIdleConnections 任意时间可能存在的空闲连接数
其它….
JNDI:采用服务器提供的JNDI技术实现,来获取DataSource对象,不同的服务器所能拿到DataSource是不一样。如果不是web或者maven的war工程,JNDI是不能使用的
property可以是(最多只包含以下两个属性):
initial_context 这个属性用来在 InitialContext 中寻找上下文(即,initialContext.lookup(initial_context))这是个可选属性,如果忽略,那么将会直接从 InitialContext 中寻找 data_source 属性
data_source 这是引用数据源实例位置的上下文路径。提供了 initial_context 配置时会在其返回的上下文中进行查找,没有提供时则直接在 InitialContext 中查找
mappers:在mappers标签中可以配置多个sql映射文件的路径
mapper:配置某个sql映射文件的路径
resource属性:使用相对于类路径的资源引用方式
url属性:使用完全限定资源定位符(URL)方式
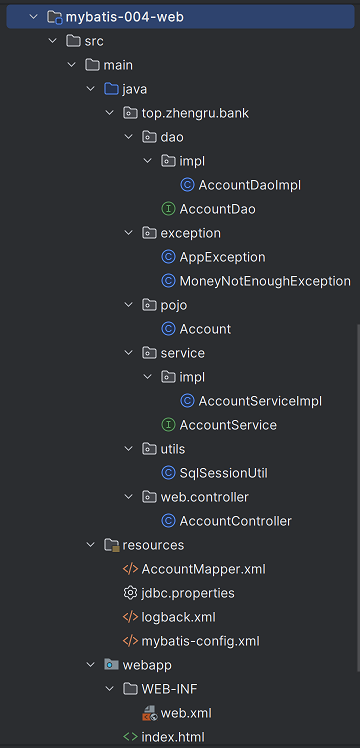
在WEB中应用MyBatis
实现功能
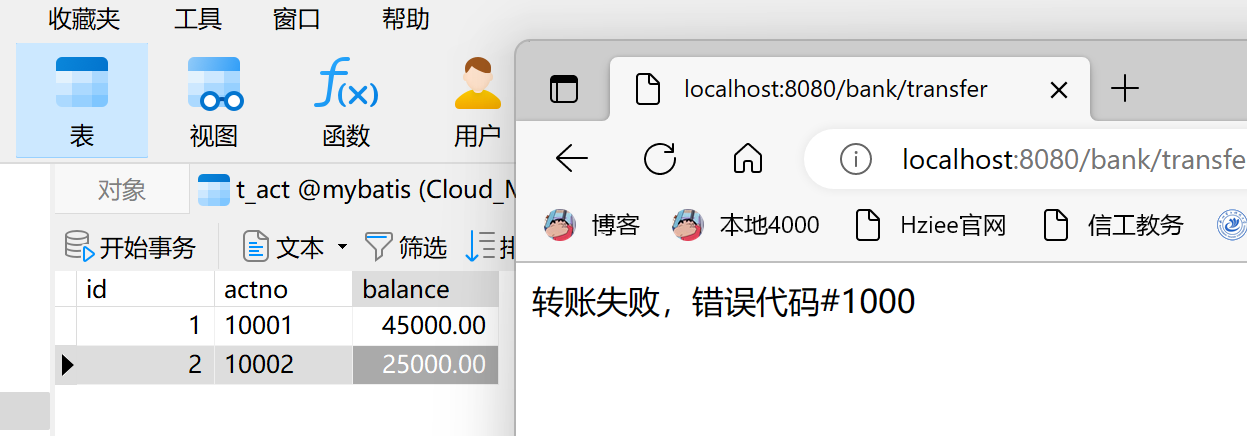
银行账户转账
项目结构
项目依赖
<dependencies>
  <!--mybatis核心依赖-->
  <dependency>
    <groupId>org.mybatis</groupId>
    <artifactId>mybatis</artifactId>
    <version>3.5.10</version>
  </dependency>
  <!--mysql驱动依赖-->
  <dependency>
    <groupId>mysql</groupId>
    <artifactId>mysql-connector-java</artifactId>
    <version>5.1.48</version>
  </dependency>
  <!--junit依赖-->
  <dependency>
    <groupId>junit</groupId>
    <artifactId>junit</artifactId>
    <version>4.13.2</version>
    <scope>test</scope>
  </dependency>
  <!--logback日志依赖-->
  <dependency>
    <groupId>ch.qos.logback</groupId>
    <artifactId>logback-classic</artifactId>
    <version>1.2.11</version>
    <scope>test</scope>
  </dependency>
  <!--servlet依赖-->
  <dependency>
    <groupId>javax.servlet</groupId>
    <artifactId>javax.servlet-api</artifactId>
    <version>4.0.1</version>
    <scope>provided</scope>
  </dependency>
</dependencies>
配置文件
mybatis-config
<?xml version="1.0" encoding="UTF-8" ?>
<!DOCTYPE configuration
        PUBLIC "-//mybatis.org//DTD Config 3.0//EN"
        "http://mybatis.org/dtd/mybatis-3-config.dtd">
<configuration>
    <environments default="development">
        <environment id="development">
            <transactionManager type="JDBC"/>
            <dataSource type="POOLED">
                <property name="driver" value="com.mysql.jdbc.Driver"/>
                <property name="url" value="jdbc:mysql://124.223.44.144:3306/mybatis?useSSL=false"/>
                <property name="username" value="root"/>
                <property name="password" value="dong"/>
            </dataSource>
        </environment>
    </environments>
    <mappers>
        <mapper resource="AccountMapper.xml"/>
    </mappers>
</configuration>
logback
<?xml version="1.0" encoding="UTF-8"?>

<configuration debug="false">
    <appender name="STDOUT" class="ch.qos.logback.core.ConsoleAppender">
        <encoder class="ch.qos.logback.classic.encoder.PatternLayoutEncoder">
            <pattern>%d{yyyy-MM-dd HH:mm:ss.SSS} [%thread] %-5level %logger{50} - %msg%n</pattern>
        </encoder>
    </appender>
    <appender name="FILE" class="ch.qos.logback.core.rolling.RollingFileAppender">
        <rollingPolicy class="ch.qos.logback.core.rolling.TimeBasedRollingPolicy">
            <FileNamePattern>${LOG_HOME}/TestWeb.log.%d{yyyy-MM-dd}.log</FileNamePattern>
            <MaxHistory>30</MaxHistory>
        </rollingPolicy>
        <encoder class="ch.qos.logback.classic.encoder.PatternLayoutEncoder">
            <pattern>%d{yyyy-MM-dd HH:mm:ss.SSS} [%thread] %-5level %logger{50} - %msg%n</pattern>
        </encoder>
        <triggeringPolicy class="ch.qos.logback.core.rolling.SizeBasedTriggeringPolicy">
            <MaxFileSize>100MB</MaxFileSize>
        </triggeringPolicy>
    </appender>

    <logger name="com.apache.ibatis" level="TRACE"/>
    <logger name="java.sql.Connection" level="DEBUG"/>
    <logger name="java.sql.Statement" level="DEBUG"/>
    <logger name="java.sql.PreparedStatement" level="DEBUG"/>

    <root level="DEBUG">
        <appender-ref ref="STDOUT"/>
        <appender-ref ref="FILE"/>
    </root>

</configuration>
jdbc
jdbc.driver=com.mysql.jdbc.Driver
url=jdbc:mysql://xxx.xxx.xxx.xxx:3306/mybatis?useSSL=false
username=root
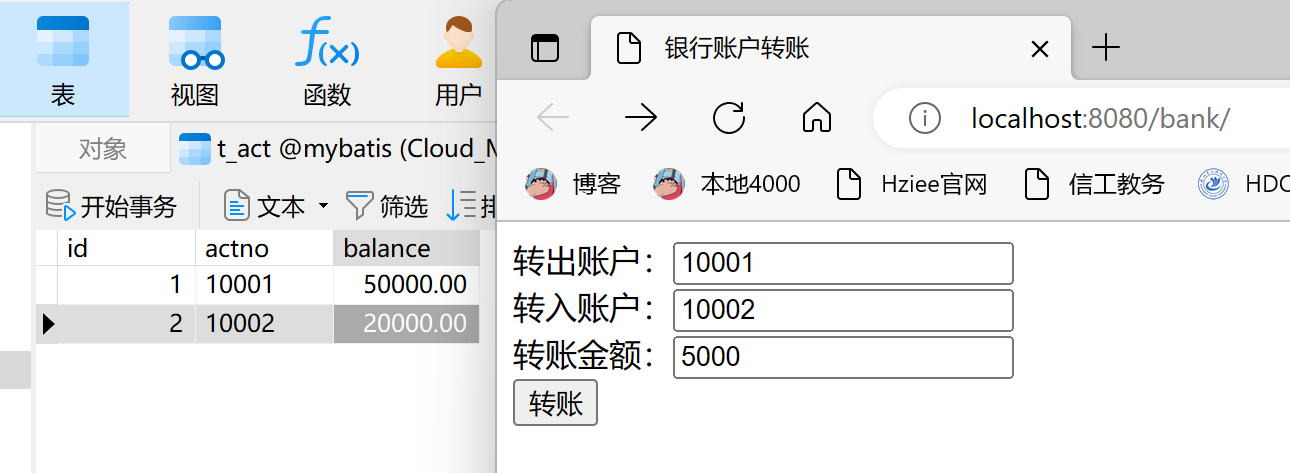
password=xxxxx前端页面
<!DOCTYPE html>
<html lang="en">
<head>
    <meta charset="UTF-8">
    <title>银行账户转账</title>
</head>
<body>
<!--/bank是应用的根,部署web应用到tomcat的时候一定要注意这个名字-->
<form action="/bank/transfer" method="post">
    转出账户:<input type="text" name="fromActno"/><br>
    转入账户:<input type="text" name="toActno"/><br>
    转账金额:<input type="text" name="money"/><br>
    <input type="submit" value="转账"/>
</form>
</body>
</html>
工具类
创建SqlSessionUtil工具类
public class SqlSessionUtil {
    private static SqlSessionFactory sqlSessionFactory = null;
    private SqlSessionUtil(){}
    static {
        try {
            sqlSessionFactory = new SqlSessionFactoryBuilder().build(Resources.getResourceAsStream("mybatis-config.xml"));
        } catch (IOException e) {
            throw new RuntimeException(e);
        }
    }
    public static SqlSession openSession(){
        return sqlSessionFactory.openSession();
    }
}
pojo类
package top.zhengru.bank.pojo;

public class Account {
    private Long id;
    private String actno;
    private Double balance;

	//对应的方法...
}
AccountDao接口
public interface AccountDao {
    Account selectByActno(String actno);
    int update(Account act);
}
AccountDaoImpl实现类
public class AccountDaoImpl implements AccountDao {

    @Override
    public Account selectByActno(String actno) {
        SqlSession sqlSession = SqlSessionUtil.openSession();
        Account act = sqlSession.selectOne("selectByActno", actno);
        sqlSession.close();
        return act;
    }

    @Override
    public int update(Account act) {
        SqlSession sqlSession = SqlSessionUtil.openSession();
        int count = sqlSession.update("update", act);
        sqlSession.commit();
        sqlSession.close();
        return count;
    }
}
SQL映射文件
<?xml version="1.0" encoding="UTF-8" ?>
<!DOCTYPE mapper
        PUBLIC "-//mybatis.org//DTD Mapper 3.0//EN"
        "http://mybatis.org/dtd/mybatis-3-mapper.dtd">

<mapper namespace="account">
    <select id="selectByActno" resultType="top.zhengru.bank.pojo.Account">
        select id,actno,balance from t_act where actno = #{actno}
    </select>
    <update id="update">
        update t_act set balance = #{balance} where actno = #{actno}
    </update>
</mapper>
小插曲
因为忘记写resultType,所以刚开始没跑起来。。。
异常类
public class MoneyNotEnoughException extends Exception{
    public MoneyNotEnoughException(){}
    public MoneyNotEnoughException(String msg){
        super(msg);
    }
}
public class AppException extends Exception{
public AppException(){}
public AppException(String msg){
super(msg);
}
}AccountService接口
public interface AccountService {
    void transfer(String fromActno,String toActno,double money)
        throws MoneyNotEnoughException, AppException;
}
AccountServiceImpl实现类
public class AccountServiceImpl implements AccountService {
private AccountDao accountDao = new AccountDaoImpl();
@Override
public void transfer(String fromActno, String toActno, double money) throws MoneyNotEnoughException, AppException {
Account fromAct = accountDao.selectByActno(fromActno);
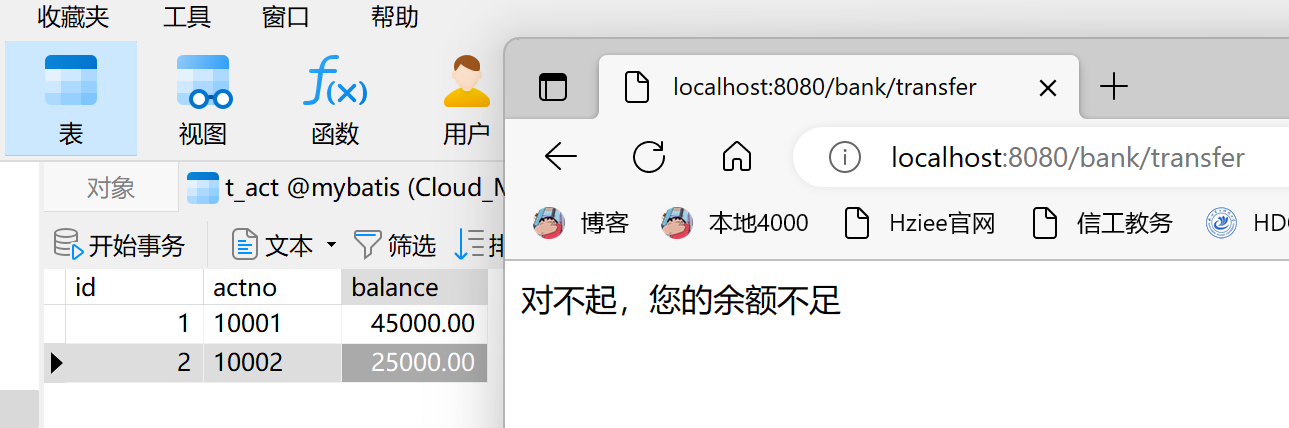
if (fromAct.getBalance() < money) {
throw new MoneyNotEnoughException("对不起,您的余额不足");
}
try {
Account toAct = accountDao.selectByActno(toActno);
fromAct.setBalance(fromAct.getBalance() - money);
toAct.setBalance(toAct.getBalance() + money);
accountDao.update(fromAct);
accountDao.update(toAct);
} catch (Exception e) {
throw new AppException("转账失败,错误代码#1000");
}
}
}AccountController类
@WebServlet("/transfer")
public class AccountController extends HttpServlet {
private AccountService accountService = new AccountServiceImpl();
@Override
protected void doPost(HttpServletRequest request, HttpServletResponse response) throws ServletException, IOException {
response.setContentType("text/html;charset=UTF-8");
PrintWriter out = response.getWriter();
String fromActno = request.getParameter("fromActno");
String toActno = request.getParameter("toActno");
double money = Integer.parseInt(request.getParameter("money"));
try {
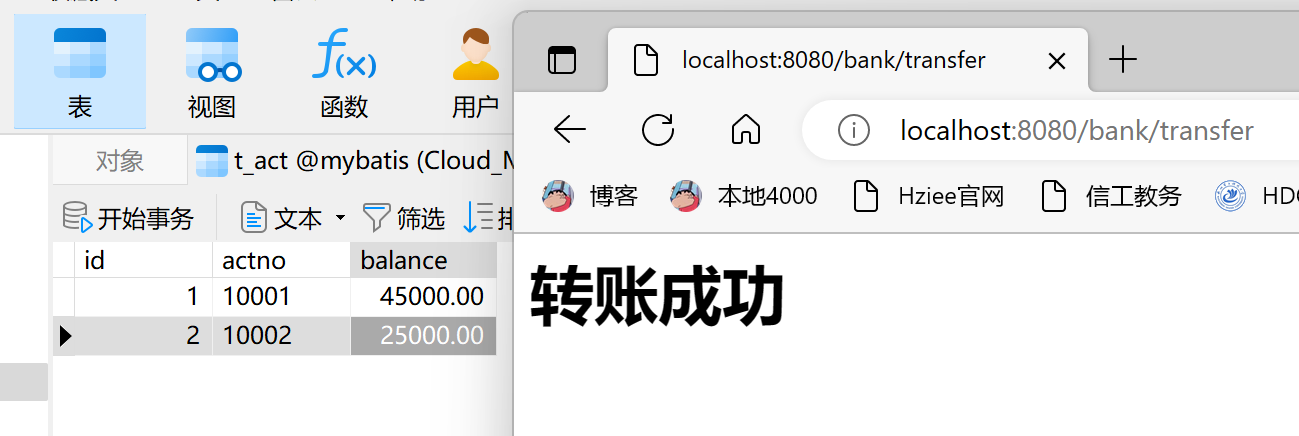
accountService.transfer(fromActno, toActno, money);
out.print("<h1>转账成功</h1>");
} catch (MoneyNotEnoughException e) {
out.print(e.getMessage());
} catch (AppException e) {
out.print(e.getMessage());
}
}
}效果
转账页面
转账成功
余额不足
转账失败
事务问题
利用ThreadLocal来解决事务的问题
public class SqlSessionUtil {
    private static ThreadLocal<SqlSession> local = new ThreadLocal<>();
    public static void close(SqlSession sqlSession){
        if (sqlSession!=null){
            sqlSession.close();
            local.remove();
        }
    }
}删除dao里的commit和close
然后在AccountServiceImpl实现类里添加事务
public class AccountServiceImpl implements AccountService {
    private AccountDao accountDao = new AccountDaoImpl();
    @Override
    public void transfer(String fromActno, String toActno, double money) throws MoneyNotEnoughException, AppException {
        Account fromAct = accountDao.selectByActno(fromActno);
        if (fromAct.getBalance() < money) {
            throw new MoneyNotEnoughException("对不起,您的余额不足");
        }
        try {
            Account toAct = accountDao.selectByActno(toActno);
            fromAct.setBalance(fromAct.getBalance() - money);
            toAct.setBalance(toAct.getBalance() + money);
            SqlSession sqlSession = SqlSessionUtil.openSession();	//新增
            accountDao.update(fromAct);
            accountDao.update(toAct);
            sqlSession.commit();	//新增
            SqlSessionUtil.close(sqlSession);	//新增
        } catch (Exception e) {
            throw new AppException("转账失败,错误代码#1000");
        }
    }
}
使用Javassist生成类
依赖
<!--javassist-->
<dependency>
    <groupId>org.javassist</groupId>
    <artifactId>javassist</artifactId>
    <version>3.29.1-GA</version>
</dependency>
mybatis内置javassist所以不用添加此依赖
样例
public class JavassistTest {
    public static void main(String[] args) throws Exception {
        // 获取类池
        ClassPool pool = ClassPool.getDefault();
        // 创建类
        CtClass ctClass = pool.makeClass("com.powernode.javassist.Test");
        // 创建方法
        // 1.返回值类型 2.方法名 3.形式参数列表 4.所属类
        CtMethod ctMethod = new CtMethod(CtClass.voidType, "execute", new CtClass[]{}, ctClass);
        // 设置方法的修饰符列表
        ctMethod.setModifiers(Modifier.PUBLIC);
        // 设置方法体
        ctMethod.setBody("{System.out.println(\"hello world\");}");
        // 给类添加方法
        ctClass.addMethod(ctMethod);
        // 调用方法
        Class<?> aClass = ctClass.toClass();
        Object o = aClass.newInstance();
        Method method = aClass.getDeclaredMethod("execute");
        method.invoke(o);
    }
}
上面都是在扯淡(原理)真正的用法是getMapper
接口代理机制及使用
修改AccountMapper.xml文件
- namespace必须是dao接口的全限定名称
- id必须是dao接口中的方法名
<mapper namespace="top.zhengru.bank.dao.AccountDao">
    <select id="selectByActno" resultType="top.zhengru.bank.pojo.Account">
        select id,actno,balance from t_act where actno = #{actno}
    </select>
    <update id="update">
        update t_act set balance = #{balance} where actno = #{actno}
    </update>
</mapper>然后在service类中使用getMapper即可(上面的修改是必要前提)
//private AccountDao accountDao = new AccountDaoImpl();
//面向接口获取接口的代理对象
   private AccountDao accountDao = SqlSessionUtil.openSession().getMapper(AccountDao.class);
一般使用mybatis的话,一般叫XXXMapper而不叫XXXDao
MyBatis小技巧
#{}和${}
\#{}- 先编译sql语句,再给占位符传值,底层是PreparedStatement实现。可以防止sql注入,比较常用
${}- 先进行sql语句拼接,然后再编译sql语句,底层是Statement实现。存在sql注入现象。只有在需要进行sql语句关键字拼接的情况下才会用到
原则:能用
#{}就不用${}
什么情况下必须使用${}
当需要进行sql语句关键字拼接的时候,必须使用${}
- 数据排序
- 拼接表名
- 批量删除
- 模拟查询
说人话就是
#{}会带'',${}不会带''
typeAliases
resultType属性用来指定查询结果集的封装类型,可以在mybatis-config.xml里给他起别名
第一种方式:typeAlias
<typeAliases>
  <typeAlias type="com.powernode.mybatis.pojo.Car" alias="Car"/>
</typeAliases>当然还有顺序properties?,settings?,typeAliases?,typeHandlers?,objectFactory?
第二种方式:package
如果一个包下的类太多,每个类都要起别名,会导致typeAlias标签配置较多,所以mybatis用提供package的配置方式,只需要指定包名,该包下的所有类都自动起别名,别名就是简类名。并且别名不区分大小写
<typeAliases>
  <package name="com.powernode.mybatis.pojo"/>
</typeAliases>也可以配置多个package
mappers
SQL映射文件的配置方式包括四种:
- resource:从类路径中加载
- url:从指定的全限定资源路径中加载
- class:使用映射器接口实现类的完全限定类名
- package:将包内的映射器接口实现全部注册为映射器
resource
从类路径中加载配置文件,所以这种方式要求SQL映射文件必须放在resources目录下或其子目录下
<mappers>
  <mapper resource="org/mybatis/builder/AuthorMapper.xml"/>
  <mapper resource="org/mybatis/builder/BlogMapper.xml"/>
  <mapper resource="org/mybatis/builder/PostMapper.xml"/>
</mappers>
url
使用了绝对路径的方式(没用)
<mappers>
  <mapper url="file:///var/mappers/AuthorMapper.xml"/>
  <mapper url="file:///var/mappers/BlogMapper.xml"/>
  <mapper url="file:///var/mappers/PostMapper.xml"/>
</mappers>
class
必须满足以下条件:
- SQL映射文件和mapper接口放在同一个目录下。
- SQL映射文件的名字也必须和mapper接口名一致。
<!-- 使用映射器接口实现类的完全限定类名 -->
<mappers>
  <mapper class="org.mybatis.builder.AuthorMapper"/>
  <mapper class="org.mybatis.builder.BlogMapper"/>
  <mapper class="org.mybatis.builder.PostMapper"/>
</mappers>
这里要注意一下在resource下新建目录时,要以/来分级:top/zhengru/mybatis/mapper
<mappers>
  <mapper class="com.powernode.mybatis.mapper.CarMapper"/>
</mappers>
package
如果class较多,可以使用这种package的方式,但前提条件和上一种方式一样
<!-- 将包内的映射器接口实现全部注册为映射器 -->
<mappers>
  <package name="com.powernode.mybatis.mapper"/>
</mappers>
idea配置文件模板
mybatis-config
<?xml version="1.0" encoding="UTF-8" ?>
<!DOCTYPE configuration
        PUBLIC "-//mybatis.org//DTD Config 3.0//EN"
        "http://mybatis.org/dtd/mybatis-3-config.dtd">
<configuration>
    <properties resource="jdbc.properties"/>
    <typeAliases>
        <package name=""/>
    </typeAliases>
    <environments default="development">
        <environment id="development">
            <transactionManager type="JDBC"/>
            <dataSource type="POOLED">
                <property name="driver" value="${jdbc.driver}"/>
                <property name="url" value="${jdbc.url}"/>
                <property name="username" value="${username}"/>
                <property name="password" value="${password}"/>
            </dataSource>
        </environment>
    </environments>
    <mappers>
        <package name=""/>
    </mappers>
</configuration>
mapper
<?xml version="1.0" encoding="UTF-8" ?>
<!DOCTYPE mapper
        PUBLIC "-//mybatis.org//DTD Mapper 3.0//EN"
        "http://mybatis.org/dtd/mybatis-3-mapper.dtd">

<mapper namespace="">

</mapper>
插入数据时获取自动生成的主键
useGeneratedKeys使用自动生成的主键值
keyProperty指定主键值赋值给对象的哪个属性
<insert id="insertUseGeneratedKeys" useGeneratedKeys="true" keyProperty="id">
  insert into t_car(id,car_num,brand,guide_price,produce_time,car_type) values(null,#{carNum},#{brand},#{guidePrice},#{produceTime},#{carType})
</insert>
MyBatis参数处理
单个简单类型参数
根据name查、根据id查、根据birth查、根据sex查
完整写法:
<select id="selectByName" resultType="student" parameterType="java.lang.String">
  select * from t_student where name = #{name, javaType=String, jdbcType=VARCHAR}
</select>parameterType这个一般可以不写因为mybatis可以自动推断出来
另外如果参数只有一个的话,#{} 里面的内容就随便写了
Map参数
手动封装Map集合,将每个条件以key和value的形式存放到集合中
在使用的时候通过#{map集合的key}来取值
List<Student> selectByParamMap(Map<String,Object> paramMap);

int insertStudentByMap(Map<String,Object> map);
@Test
public void testSelectByParamMap(){
Map<String,Object> paramMap = new HashMap<>();
paramMap.put("nameKey","张三");
paramMap.put("ageKey","20");
SqlSession sqlSession = SqlSessionUtil.openSession();
StudentMapper mapper = sqlSession.getMapper(StudentMapper.class);
List<Student> students = mapper.selectByParamMap(paramMap);
sqlSession.close();
students.forEach(student -> System.out.println(student));
}
@Test
public void testInsertStudentByMap(){
Map<String,Object> map = new HashMap<>();
map.put("姓名","赵六");
map.put("年龄",20);
map.put("身高",1.81);
map.put("性别",'男');
map.put("生日",new Date());
SqlSession sqlSession = SqlSessionUtil.openSession();
StudentMapper mapper = sqlSession.getMapper(StudentMapper.class);
int count = mapper.insertStudentByMap(map);
sqlSession.commit();
sqlSession.close();
System.out.println(count);
}<select id="selectByParamMap" resultType="Student">
select * from t_student where name = #{nameKey} and age = #{ageKey}
</select>
<insert id="insertStudentByMap">
insert into t_student(id,name,age,sex,birth,height)
values(null,#{姓名},#{年龄},#{性别},#{生日},#{身高})
</insert>实体类参数
#{} 里面写的是属性名字,本质上是set/get方法
<insert id="insert">
    insert into t_student(id,name,age,sex,birth,height)
    values(null,#{name},#{age},#{sex},#{birth},#{height})
</insert>
多参数
唯一值得注意的:
arg0是第一个参数param1是第一个参数arg1是第二个参数param2是第二个参数
实现原理:实际上在mybatis底层会创建一个map集合,以arg0/param1为key,以方法上的参数为value
<select id="selectByNameAndSex" resultType="Student">
	select * from t_student where name = #{param1} and sex = #{param2}
</select>
使用mybatis3.4.2之前的版本时:要用#{0}和#{1}这种形式
@Param注解(命名参数)
使用示例
@Param("**这里填写的其实就是map集合的key**")
另外value可以省略
List<Student> selectByNameAndAge(@Param(value="name") String name, @Param("age") int age);MyBatis查询语句专题
以Car为例
- 查询结果是一条的话可以使用List集合或对应实体类接收(
返回Car) - 多条的时候必须用集合接收,否则会出现异常(
返回List<Car>) - 没有合适的实体类对应的话,可以采用Map集合接收。字段名做key,字段值做value(
返回Map)- resultMap=”map”,因为mybatis内置了很多别名
- 查询结果条数大于等于1条数据,则可以返回一个存储Map集合的List集合(
返回List<Map>) - 拿Car的id做key,以后取出对应的Map集合时更方便(
返回Map<String,Map>)
resultMap结果映射
查询结果的列名和java对象的属性名对应不上怎么办
- 第一种方式:as 给列起别名
- 第二种方式:使用resultMap进行结果映射
- 第三种方式:是否开启驼峰命名自动映射(配置settings)
使用resultMap进行结果映射
<resultMap id="StudentResultMap" type="Student">
    <!--为了提高mybatis的性能,建议写上主键-->
    <id property="id" column="id"></id>
    <!--当属性名和数据库列名一致时,可以省略,但建议都写上-->
    <result property="" column=""></result>
</resultMap>
	<!--resultMap需要和上面的id相同-->
<select id="selectAllByResultMap" resultMap="StudentResultMap">
    select * from t_student
</select>
开启驼峰命名自动映射
前提是:属性名遵循Java的命名规范,数据库表的列名遵循SQL的命名规范
- Java命名规范
- 首字母小写,后面每个单词首字母大写,遵循驼峰命名方式
- SQL命名规范
- 全部小写,单词之间采用下划线分割
<settings>
	<setting name="mapUnderscoreToCamelCase" value="true"/>
</settings>
其他都照常写
返回总记录条数
Long selectTotal();<select id="selectTotal" resultType="Long">
select count(*) from t_student
</select>动态SQL
if标签
用法如下
<select id="selectByMultiCondition" resultType="Car">
    select * from t_car where 1 = 1
    <if test="brand != null and brand != ''">
    	and brand like "%"#{brand}"%"
    </if>
    <if test="guidePrice != null and guidePrice != ''">
    	and guide_price > #{guidePrice}
    </if>
    <if test="carType != null and carType != ''">
    	and car_type = #{carType}
    </if>
</select>
where标签
- 所有条件都为空时,where标签保证不会生成where子句。
- 自动去除某些条件前面多余的and或or
- 后面多余的and是不会被去除的
<select id="selectByMultiConditionWithWhere" resultType="Car">
    select * from t_car
    <where>
        <if test="brand != null and brand != ''">
        	and brand like "%"#{brand}"%"
        </if>
        <if test="guidePrice != null and guidePrice != ''">
        	and guide_price > #{guidePrice}
        </if>
        <if test="carType != null and carType != ''">
        	and car_type = #{carType}
        </if>
    </where>
</select>
trim标签
- prefix:在trim标签中的语句前添加内容
- suffix:在trim标签中的语句后添加内容
- prefixOverrides:前缀覆盖掉(去掉)
- suffixOverrides:后缀覆盖掉(去掉)
<select id="selectByMultiConditionWithTrim" resultType="Car">
    select * from t_car
    <trim prefix="where" suffixOverrides="and|or">
        <if test="brand != null and brand != ''">
        	brand like "%"#{brand}"%" and
        </if>
        <if test="guidePrice != null and guidePrice != ''">
        	guide_price > #{guidePrice} and
        </if>
        <if test="carType != null and carType != ''">
        	car_type = #{carType} and
        </if>
    </trim>
</select>
set标签
主要使用在update语句当中,用来生成set关键字,同时去掉最后多余的“,”
<update id="updateWithSet">
    update t_car
    <set>
        <if test="carNum != null and carNum != ''">car_num = #{carNum},</if>
        <if test="brand != null and brand != ''">brand = #{brand},</if>
        <if test="guidePrice != null and guidePrice != ''">guide_price = #{guidePrice},</if>
        <if test="produceTime != null and produceTime != ''">produce_time = #{produceTime},</if>
        <if test="carType != null and carType != ''">car_type = #{carType},</if>
    </set>
    where id = #{id}
</update>
choose when otherwise
只有一个分支会被选择(等同if-else if)
示例需求:先根据品牌查询,如果没有提供品牌,再根据指导价格查询,如果没有提供指导价格,就根据生产日期查询
<select id="selectWithChoose" resultType="Car">
    select * from t_car
    <where>
        <choose>
            <when test="brand != null and brand != ''">
                brand like "%"#{brand}"%"
            </when>
            <when test="guidePrice != null and guidePrice != ''">
            	guide_price >= #{guidePrice}
            </when>
            <otherwise>
            	produce_time >= #{produceTime}
            </otherwise>
        </choose>
    </where>
</select>
foreach标签
collection:集合或数组item:集合或数组中的元素separator:分隔符open:foreach标签中所有内容的开始close:foreach标签中所有内容的结束
int deleteBatchByForeach(@Param("ids") Long[] ids);<delete id="deleteBatchByForeach">
delete from t_car where id in
<foreach collection="ids" item="id" separator="," open="(" close=")">
#{id}
</foreach>
</delete>sql标签与include标签
sql标签用来声明sql片段
include标签用来将声明的sql片段包含到某个sql语句当中
<sql id="carCols">id,car_num carNum,brand,guide_price guidePrice,produce_time produceTime,car_type carType</sql>
<select id="示例代码" resultType="Car">
	select <include refid="carCols"/> from t_car
</select>
MyBatis的高级映射及延迟加载
多对一
多种方式,常见的包括三种:
- 第一种方式:一条SQL语句,级联属性映射
- 第二种方式:一条SQL语句,association
- 第三种方式:两条SQL语句,分步查询(常用:优点一是可复用,优点二是支持懒加载)
级联属性映射
<resultMap id="studentResultMap" type="Student">
    <id property="sid" column="sid"></id>
    <result property="sname" column="sname"></result>
    <result property="clazz.cid" column="cid"></result>
    <result property="clazz.cname" column="cname"></result>
</resultMap>

<select id="selectById" resultMap="studentResultMap">
    select
    	s.sid,s.sname,c.cid,c.cname
    from
    	t_stu s left join t_clazz c on s.cid = c.cid
    where
    	s.sid = #{sid}
</select>
association
只需要修改resultMap中的配置:association即可
<resultMap id="studentResultMap" type="Student">
    <id property="sid" column="sid"></id>
    <result property="sname" column="sname"></result>
    <association property="clazz" javaType="Clazz">
        <result property="cid" column="cid"></result>
        <result property="cname" column="cname"></result>
    </association>
</resultMap>
分步查询
association中select位置填写sqlId
sqlId=namespace+id
其中column属性作为这条子sql语句的条件
<resultMap id="studentResultMapByStep" type="Student">
	<id property="sid" column="sid"/>
<result property="sname" column="sname"/>
<association property="clazz"
            select="top.zhengru.mybatis.mapper.ClazzMapper.selectByIdStep2"
            column="cid"/>
</resultMap>

<select id="selectByIdStep1" resultMap="studentResultMapByStep">
	select sid,sname,cid from t_stu where sid = #{sid}
</select>在ClazzMapper接口中添加方法
Clazz selectByIdStep2(Integer cid);在ClazzMapper.xml文件中进行配置
<select id="selectByIdStep2" resultType="Clazz">
	select * from t_clazz where cid = #{cid}
</select>
分步优点:
- 第一个优点:代码复用性增强
- 第二个优点:支持延迟加载【暂时访问不到的数据可以先不查询,提高程序的执行效率】
多对一延迟加载
只需要在association标签中添加fetchType="lazy"即可
全局延迟加载(针对特定sql不支持延迟加载,将fetchType设置为eager即可)
要不要开启延迟加载机制,主要看实际的业务需求是怎样的
<settings>
  <setting name="lazyLoadingEnabled" value="true"/>
</settings>
一对多
在一的一方中有List集合属性
public class Clazz {
    private Integer cid;
    private String cname;
    private List<Student> stus;
}
collection
<resultMap id="clazzResultMap" type="Clazz">
    <id property="cid" column="cid"></id>
    <result property="cname" column="cname"></result>
    <collection property="stus" ofType="Student">
        <id property="sid" column="sid"></id>
        <result property="sname" column="sname"></result>
    </collection>
</resultMap>

<select id="selectByCollection" resultMap="clazzResultMap">
	select
    	c.cid,c.cname,s.sid,s.sname
    from
    	t_clazz c
    left join
    	t_stu s
    on
    	c.cid = s.cid
    where
    	c.cid = #{cid}
</select>注意是ofType,表示“集合中的类型”
分步查询
<resultMap id="clazzResultMap2" type="Clazz">
	<id property="cid" column="cid"></id>
	<result property="cname" column="cname"></result>
	<collection property="stus"
			select="top.zhengru.mybatis.mapper.StudentMapper.selectByCid"
			column="cid"/>
</resultMap>

<select id="selectByIdStep1" resultMap="clazzResultMap2">
	select * from t_clazz c where c.cid = #{cid}
</select>
一对多延迟加载
跟多对一一样
…
看了铃芽之旅^_^

MyBatis的缓存
mybatis缓存包括:
- 一级缓存:将查询到的数据存储到SqlSession中
- 二级缓存:将查询到的数据存储到SqlSessionFactory中
- 或者集成其它第三方的缓存:比如EhCache【Java语言开发的】、Memcache【C语言开发的】等
缓存只针对于DQL语句,也就是说缓存机制只对应select语句
一级缓存
一级缓存默认是开启的,不需要做任何配置
原理:只要使用同一个SqlSession对象执行同一条SQL语句,就会走缓存
什么情况下不走缓存
- 第一种:不同的
SqlSession对象。 - 第二种:查询条件变化了。
一级缓存失效情况包括两种:
- 第一种:第一次查询和第二次查询之间,手动清空了一级缓存
- 第二种:第一次查询和第二次查询之间,执行了增删改操作(只要有
insert delete update操作,一级缓存就失效)
sqlSession.clearCache(); //清空一级缓存二级缓存
二级缓存的范围是SqlSessionFactory
使用二级缓存需要具备以下几个条件:
<setting name="cacheEnabled" value="true">全局性地开启或关闭所有映射器配置文件中已配置的任何缓存,默认就是true- 在需要使用二级缓存的SqlMapper.xml文件中添加配置:
<cache /> - 使用二级缓存的实体类对象必须是可序列化的,也就是必须实现
java.io.Serializable接口 - SqlSession对象关闭或提交之后,一级缓存中的数据才会被写入到二级缓存当中
二级缓存的相关配置:
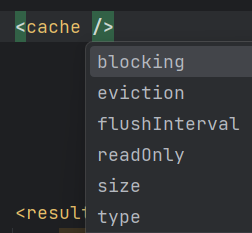
- eviction:指定从缓存中移除某个对象的淘汰算法。默认采用LRU策略
- LRU:Least Recently Used,最近最少使用,优先淘汰在间隔时间内使用频率最低的对象(其实还有一种淘汰算法LFU,最不常用)
- FIFO:First In First Out,一种先进先出的数据缓存器,先进入二级缓存的对象最先被淘汰
- SOFT:软引用,淘汰软引用指向的对象,具体算法和JVM的垃圾回收算法有关
- WEAK:弱引用,淘汰弱引用指向的对象,具体算法和JVM的垃圾回收算法有关
- flushInterval:
- 二级缓存的刷新时间间隔,单位毫秒,如果没有设置,就代表不刷新缓存,只要内存足够大,一直会向二级缓存中缓存数据,除非执行了增删改
- readOnly:
- true:多条相同的sql语句执行之后返回的对象是共享的同一个,性能好,但是多线程并发可能会存在安全问题
- false:多条相同的sql语句执行之后返回的对象是副本,调用了clone方法,性能一般。但安全
- size:
- 设置二级缓存中最多可存储的java对象数量,默认值1024
MyBatis集成EhCache
依赖
<!--mybatis集成ehcache的组件-->
<dependency>
  <groupId>org.mybatis.caches</groupId>
  <artifactId>mybatis-ehcache</artifactId>
  <version>1.2.2</version>
</dependency>在类的根路径下新建echcache.xml文件
<?xml version="1.0" encoding="UTF-8"?>
<ehcache xmlns:xsi="http://www.w3.org/2001/XMLSchema-instance"
         xsi:noNamespaceSchemaLocation="http://ehcache.org/ehcache.xsd"
         updateCheck="false">
    <!--磁盘存储:将缓存中暂时不使用的对象,转移到硬盘,类似于Windows系统的虚拟内存-->
    <diskStore path="e:/ehcache"/>

    <!--defaultCache:默认的管理策略-->
    <!--eternal:设定缓存的elements是否永远不过期。如果为true,则缓存的数据始终有效,如果为false那么还要根据timeToIdleSeconds,timeToLiveSeconds判断-->
    <!--maxElementsInMemory:在内存中缓存的element的最大数目-->
    <!--overflowToDisk:如果内存中数据超过内存限制,是否要缓存到磁盘上-->
    <!--diskPersistent:是否在磁盘上持久化。指重启jvm后,数据是否有效。默认为false-->
    <!--timeToIdleSeconds:对象空闲时间(单位:秒),指对象在多长时间没有被访问就会失效。只对eternal为false的有效。默认值0,表示一直可以访问-->
    <!--timeToLiveSeconds:对象存活时间(单位:秒),指对象从创建到失效所需要的时间。只对eternal为false的有效。默认值0,表示一直可以访问-->
    <!--memoryStoreEvictionPolicy:缓存的3 种清空策略-->
    <!--FIFO:first in first out (先进先出)-->
    <!--LFU:Less Frequently Used (最少使用).意思是一直以来最少被使用的。缓存的元素有一个hit 属性,hit 值最小的将会被清出缓存-->
    <!--LRU:Least Recently Used(最近最少使用). (ehcache 默认值).缓存的元素有一个时间戳,当缓存容量满了,而又需要腾出地方来缓存新的元素的时候,那么现有缓存元素中时间戳离当前时间最远的元素将被清出缓存-->
    <defaultCache eternal="false" maxElementsInMemory="1000" overflowToDisk="false" diskPersistent="false"
                  timeToIdleSeconds="0" timeToLiveSeconds="600" memoryStoreEvictionPolicy="LRU"/>

</ehcache>修改<cache/>标签
<cache type="org.mybatis.caches.ehcache.EhcacheCache"/>MyBatis的逆向工程
逆向工程配置与生成
在pom中添加逆向工程插件
<build>
    <!--可配置多个插件-->
    <plugins>
        <!--其中的一个插件:mybatis逆向工程插件-->
        <plugin>
            <!--插件的GAV坐标-->
            <groupId>org.mybatis.generator</groupId>
            <artifactId>mybatis-generator-maven-plugin</artifactId>
            <version>1.4.1</version>
            <!--允许覆盖-->
            <configuration>
                <overwrite>true</overwrite>
            </configuration>
            <!--插件的依赖-->
            <dependencies>
                <!--mysql驱动依赖-->
                <dependency>
                    <groupId>mysql</groupId>
                    <artifactId>mysql-connector-java</artifactId>
                    <version>5.1.48</version>
                </dependency>
            </dependencies>
        </plugin>
    </plugins>
</build>
配置generatorConfig.xml
<?xml version="1.0" encoding="UTF-8"?>
<!DOCTYPE generatorConfiguration
        PUBLIC "-//mybatis.org//DTD MyBatis Generator Configuration 1.0//EN"
        "http://mybatis.org/dtd/mybatis-generator-config_1_0.dtd">

<generatorConfiguration>
    <!--
        targetRuntime有两个值:
            MyBatis3Simple:生成的是基础版,只有基本的增删改查。
            MyBatis3:生成的是增强版,除了基本的增删改查之外还有复杂的增删改查。
    -->
    <context id="DB2Tables" targetRuntime="MyBatis3">
        <!--防止生成重复代码-->
        <plugin type="org.mybatis.generator.plugins.UnmergeableXmlMappersPlugin"/>

        <commentGenerator>
            <!--是否去掉生成日期-->
            <property name="suppressDate" value="true"/>
            <!--是否去除注释-->
            <property name="suppressAllComments" value="true"/>
        </commentGenerator>

        <!--连接数据库信息-->
        <jdbcConnection driverClass="com.mysql.jdbc.Driver"
                        connectionURL="jdbc:mysql://xxx.xxx.xxx.xxx:3306/mybatis?useSSL=false"
                        userId="root"
                        password="xxxxx">
        </jdbcConnection>

        <!-- 生成pojo包名和位置 -->
        <javaModelGenerator targetPackage="top.zhengru.mybatis.pojo" targetProject="src/main/java">
            <!--是否开启子包-->
            <property name="enableSubPackages" value="true"/>
            <!--是否去除字段名的前后空白-->
            <property name="trimStrings" value="true"/>
        </javaModelGenerator>

        <!-- 生成SQL映射文件的包名和位置 -->
        <sqlMapGenerator targetPackage="top.zhengru.mybatis.mapper" targetProject="src/main/resources">
            <!--是否开启子包-->
            <property name="enableSubPackages" value="true"/>
        </sqlMapGenerator>

        <!-- 生成Mapper接口的包名和位置 -->
        <javaClientGenerator
                type="xmlMapper"
                targetPackage="top.zhengru.mybatis.mapper"
                targetProject="src/main/java">
            <property name="enableSubPackages" value="true"/>
        </javaClientGenerator>

        <!-- 表名和对应的实体类名-->
        <table tableName="t_stu" domainObjectName="Student"/>
        <table tableName="t_clazz" domainObjectName="Clazz"/>

    </context>
</generatorConfiguration>
MyBatis使用PageHelper
引入依赖
<dependency>
  <groupId>com.github.pagehelper</groupId>
  <artifactId>pagehelper</artifactId>
  <version>5.3.1</version>
</dependency>
在mybatis-config.xml文件中配置插件
<plugins>
  <plugin interceptor="com.github.pagehelper.PageInterceptor"></plugin>
</plugins>
编写Java代码
PageInfo对象将来会存储到request域当中
@Test
public void testPageHelper() throws Exception{
    SqlSessionFactory sqlSessionFactory = new SqlSessionFactoryBuilder().build(Resources.getResourceAsStream("mybatis-config.xml"));
    SqlSession sqlSession = sqlSessionFactory.openSession();
    CarMapper mapper = sqlSession.getMapper(CarMapper.class);

    // 开启分页
    PageHelper.startPage(2, 2);

    // 执行查询语句
    List<Car> cars = mapper.selectAll();

    // 获取分页信息对象
    PageInfo<Car> pageInfo = new PageInfo<>(cars, 5);

    System.out.println(pageInfo);
}
PageInfo信息
PageInfo{
  pageNum=2, pageSize=2, size=2, startRow=3, endRow=4, total=6, pages=3,
  list=Page{count=true, pageNum=2, pageSize=2, startRow=2, endRow=4, total=6, pages=3, reasonable=false, pageSizeZero=false}
  [Car{id=86, carNum='1234', brand='丰田霸道', guidePrice=50.5, produceTime='2020-10-11', carType='燃油车'},
  Car{id=87, carNum='1234', brand='丰田霸道', guidePrice=50.5, produceTime='2020-10-11', carType='燃油车'}],
  prePage=1, nextPage=3, isFirstPage=false, isLastPage=false, hasPreviousPage=true, hasNextPage=true,
  navigatePages=5, navigateFirstPage=1, navigateLastPage=3, navigatepageNums=[1, 2, 3]
}
MyBatis的注解式开发
简单sql可以注解,复杂sql使用xml
以@Insert为例
@Select(value = "select * from t_car where id = #{id}")
@Results({
    @Result(column = "id", property = "id", id = true),
    @Result(column = "car_num", property = "carNum"),
    @Result(column = "brand", property = "brand"),
    @Result(column = "guide_price", property = "guidePrice"),
    @Result(column = "produce_time", property = "produceTime"),
    @Result(column = "car_type", property = "carType")
})
Car selectById(Long id);同理@Delete,@Update,@Select基本一致