微人事复盘和前后端分离项目部署

项目原作者:江南一点雨
项目原地址:https://github.com/lenve/vhr
Github仓库:https://github.com/dongzhengru/vhr
本文是对于开发vhr中遇到的一些问题记录一下解决的思路,当然很多内容都来自于项目原作者,以及第一次部署前后端分离项目的记录
项目介绍
微人事是一个前后端分离的人力资源管理系统,项目采用 SpringBoot+Vue 开发,项目加入常见的企业级应用所涉及到的技术点,例如 Redis、RabbitMQ 等。
项目技术栈
后端技术栈
Spring BootSpring SecurityMyBatisMySQLRedisRabbitMQSpring CacheWebSocket...
前端技术栈
VueElementUIaxiosvue-routerVuexWebSocketvue-cli4...
发现、解决的问题
下面是一些我在开发过程当中发现了原作者的一些bug
权限组删除问题
删除角色的时候,如果角色还有权限,那么权限并不会被删除,另外我觉得两条删除操作还需要开启事务
@Transactional
public Integer deleteRoleById(Integer id) {
    menuRoleMapper.deleteByRid(id);
    return roleMapper.deleteRoleById(id);
}
操作员管理
删除HR的时候,不会删除HR的角色数据,跟上面一样
@Transactional
public Integer deleteHrById(Integer id) {
    hrRoleMapper.deleteByHrId(id);
    return hrMapper.deleteHrById(id);
}
员工基本资料搜索问题
搜索员工基本资料时,比如当前page页码在第2页,那么会连带着页码page=2发送回后端,如果说搜索结果不足2页,则会返回0条数据,出现搜索不到的情况
所以这里在查询的时候需要判断如果传了搜索条件回来,还需要加入page置零的业务逻辑
public RespPageBean getEmployeeByPage(Integer page, Integer size, Employee employee, Date[] beginDateScope) {
    if (page != null && size != null){
        page = (page - 1) * size;
    }
    if (employee != null) {
        if (employee.getName() != null && employee.getName() != "") {
            page = 0;
        }
    }
    List<Employee> data = employeeMapper.getEmployeeByPage(page,size,employee,beginDateScope);
    Long total = employeeMapper.getTotal(employee,beginDateScope);
    RespPageBean bean = new RespPageBean();
    bean.setTotal(total);
    bean.setData(data);
    return bean;
}
员工基本资料导出问题
这个问题是我部署完的时候发现的,导出员工资料就报500错
根据报错信息可以很迅速找到是下面两个判断的地方有问题(空指针)
public RespPageBean getEmployeeByPage(Integer page, Integer size, Employee employee, Date[] beginDateScope) {
    if (page != null && size != null){
        page = (page - 1) * size;
    }
    if (employee != null) {
        if (employee.getName() != null && employee.getName() != "") {
            page = 0;
        }
    }
    List<Employee> data = employeeMapper.getEmployeeByPage(page,size,employee,beginDateScope);
    Long total = employeeMapper.getTotal(employee,beginDateScope);
    RespPageBean bean = new RespPageBean();
    bean.setTotal(total);
    bean.setData(data);
    return bean;
}<select id="getEmployeeByPage" resultMap="AllEmployeeInfo">
select
e.*,
p.id as pid,p.name as pname,
n.id as nid,n.name as nname,
d.id as did,d.name as dname,
j.id as jid,j.name as jname,
pos.id as posid,pos.name as posname
from
employee e,
nation n,
politicsstatus p,
department d,
joblevel j,
position pos
where
e.nationId=n.id and
e.politicId=p.id and
e.departmentId=d.id and
e.jobLevelId=j.id and
e.posId=pos.id
<if test="emp != null">
<if test="emp.name !=null and emp.name!=''">
and e.name like concat('%',#{emp.name},'%')
</if>
<if test="emp.politicId !=null">
and e.politicId =#{emp.politicId}
</if>
<if test="emp.nationId !=null">
and e.nationId =#{emp.nationId}
</if>
<if test="emp.departmentId !=null">
and e.departmentId =#{emp.departmentId}
</if>
<if test="emp.jobLevelId !=null">
and e.jobLevelId =#{emp.jobLevelId}
</if>
<if test="emp.engageForm !=null and emp.engageForm!=''">
and e.engageForm =#{emp.engageForm}
</if>
<if test="emp.posId !=null">
and e.posId =#{emp.posId}
</if>
</if>
<if test="beginDateScope !=null">
and e.beginDate between #{beginDateScope[0]} and #{beginDateScope[1]}
</if>
<if test="page != null and size != null">
limit
#{page},#{size}
</if>
</select>角色权限管理
第一次写的时候还是有些生疏和不太理解,写博客的时候回去重新看了一下感觉顿时好多了
UserDetails
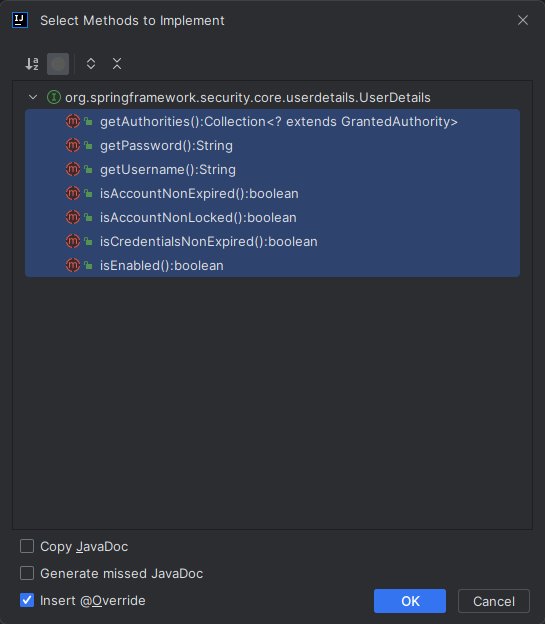
引入了SpringSecurity,这里的Hr类为用户类,实现UserDetails接口
public class Hr implements UserDetails {
    private Integer id;
    private String name;
    private String phone;
    private String telephone;
    private String address;
    private Boolean enabled;
    private String username;
    private String password;
    private String userface;
    private String remark;
    private List<Role> roles;
    private static final long serialVersionUID = 1L;
}实现UserDetails接口需要实现一些必要的方法,微人事的业务逻辑并不包含Lock账户、密码过期等,只有账户是否被禁用,因此我们只需要处理isEnabled方法。
另外,UserDetails中还有一个方法叫做getAuthorities,获取当前用户所具有的角色。
从roles中获取当前用户所具有的角色,构造SimpleGrantedAuthority然后返回
@Override
@JsonIgnore
public Collection<? extends GrantedAuthority> getAuthorities() {
    List<SimpleGrantedAuthority> authorities = new ArrayList<>(roles.size());
    for (Role role : roles) {
    	authorities.add(new SimpleGrantedAuthority(role.getName()));
    }
    return authorities;
}
UserDetailsService
当然HrService也要实现UserDetailsService接口,在执行登录的过程中,loadUserByUsername方法根据用户名去查找用户,如果用户不存在,则抛出UsernameNotFoundException异常
@Service
public class HrService implements UserDetailsService {
    @Autowired
    HrMapper hrMapper;

    @Override
    public UserDetails loadUserByUsername(String username) throws UsernameNotFoundException {
        Hr hr = hrMapper.loadUserByUsername(username);
        if (hr == null){
            throw new UsernameNotFoundException("用户名不存在");
        }
        hr.setRoles(hrMapper.getHrRolesById(hr.getId()));
        return hr;
    }
}
FilterInvocationSecurityMetadataSource
实现FilterInvocationSecurityMetadataSource接口,主要的作用是通过当前的请求地址,获取该地址需要的用户角色
如果匹配不上数据库里的路径就给ROLE_LOGIN表示登录就能访问
如果getAttributes(Object o)方法返回null的话,意味着当前这个请求不需要任何角色就能访问,甚至不需要登录
@Override
public Collection<ConfigAttribute> getAttributes(Object object) throws IllegalArgumentException {
    String requestUrl = ((FilterInvocation) object).getRequestUrl();
    List<Menu> menus = menuService.getAllMenusWithRole();
    for (Menu menu : menus) {
        if (antPathMatcher.match(menu.getUrl(),requestUrl)){
            List<Role> roles = menu.getRoles();
            String[] str = new String[roles.size()];
            for (int i = 0; i < roles.size(); i++) {
            	str[i] = roles.get(i).getName();
            }
            return SecurityConfig.createList(str);
        }
    }
    return SecurityConfig.createList("ROLE_LOGIN");
}
AccessDecisionManager
实现AccessDecisionManager接口,decide方法接收三个参数,其中第一个参数中保存了当前登录用户的角色信息,第三个参数则是UrlFilterInvocationSecurityMetadataSource中的getAttributes方法传来的,表示当前请求需要的角色
@Override
public void decide(Authentication authentication, Object o, Collection<ConfigAttribute> configAttributes) throws AccessDeniedException, InsufficientAuthenticationException {
    for (ConfigAttribute configAttribute : configAttributes) {
        String needRole = configAttribute.getAttribute();
        if ("ROLE_LOGIN".equals(needRole)){
            if (authentication instanceof AnonymousAuthenticationToken) {
                throw new AccessDeniedException("尚未登录,请登录!");
            } else {
                return;
            }
        }
        Collection<? extends GrantedAuthority> authorities = authentication.getAuthorities();
        for (GrantedAuthority authority : authorities) {
            if (authority.getAuthority().equals(needRole)){
                return;
            }
        }
    }
    throw new AccessDeniedException("权限不足,请联系管理员!");
}
WebSecurityConfigurerAdapter
最后实现WebSecurityConfigurerAdapter接口,通过withObjectPostProcessor将刚刚创建的UrlFilterInvocationSecurityMetadataSource和UrlAccessDecisionManager注入进来,successHandler中配置登录成功时返回的JSON,failureHandler表示登录失败,登录失败的原因可能有多种,我们根据不同的异常输出不同的错误提示即可
@Override
public void configure(WebSecurity web) throws Exception {
    web.ignoring().antMatchers("/login");
}

@Override
protected void configure(HttpSecurity http) throws Exception {
    http.authorizeRequests()
            .withObjectPostProcessor(new ObjectPostProcessor<FilterSecurityInterceptor>() {
                @Override
                public <O extends FilterSecurityInterceptor> O postProcess(O o) {
                    o.setAccessDecisionManager(customUrlDecisionManager);
                    o.setSecurityMetadataSource(customFilterInvocationSecurityMetadataSource);
                    return o;
                }
            })
            .and()
            .formLogin()
            .usernameParameter("username")
            .passwordParameter("password")
            .loginProcessingUrl("/doLogin")
            .loginPage("/login")
            .successHandler(new AuthenticationSuccessHandler() {
                @Override
                public void onAuthenticationSuccess(HttpServletRequest req, HttpServletResponse resp, Authentication authentication) throws IOException, ServletException {
                    resp.setContentType("application/json;charset=UTF-8");
                    PrintWriter out = resp.getWriter();
                    Hr hr = (Hr) authentication.getPrincipal();
                    hr.setPassword(null);
                    RespBean ok = RespBean.ok("登录成功!", hr);
                    String s = new ObjectMapper().writeValueAsString(ok);
                    out.write(s);
                    out.flush();
                    out.close();
                }
            })
            .failureHandler(new AuthenticationFailureHandler() {
                @Override
                public void onAuthenticationFailure(HttpServletRequest req, HttpServletResponse resp, AuthenticationException exception) throws IOException, ServletException {
                    resp.setContentType("application/json;charset=UTF-8");
                    PrintWriter out = resp.getWriter();
                    RespBean respBean = RespBean.error("登录失败!");
                    if (exception instanceof LockedException) {
                        respBean.setMsg("账户被锁定,请联系管理员!");
                    } else if (exception instanceof CredentialsExpiredException) {
                        respBean.setMsg("密码过期,请联系管理员!");
                    } else if (exception instanceof AccountExpiredException) {
                        respBean.setMsg("账户过期,请联系管理员!");
                    } else if (exception instanceof DisabledException) {
                        respBean.setMsg("账户被锁定,请联系管理员!");
                    } else if (exception instanceof BadCredentialsException) {
                        respBean.setMsg("用户名或密码输入错误,请重新输入!");
                    }
                    out.write(new ObjectMapper().writeValueAsString(respBean));
                    out.flush();
                    out.close();
                }
            })
            .permitAll()
            .and()
            .logout()
            .logoutSuccessHandler(new LogoutSuccessHandler() {
                @Override
                public void onLogoutSuccess(HttpServletRequest req, HttpServletResponse resp, Authentication authentication) throws IOException, ServletException {
                    resp.setContentType("application/json;charset=UTF-8");
                    PrintWriter out = resp.getWriter();
                    out.write(new ObjectMapper().writeValueAsString(RespBean.ok("注销成功!")));
                    out.flush();
                    out.close();
                }
            })
            .permitAll()
            .and()
            .csrf().disable().exceptionHandling().authenticationEntryPoint(new AuthenticationEntryPoint() {
                @Override
                public void commence(HttpServletRequest req, HttpServletResponse resp, AuthenticationException authException) throws IOException, ServletException {
                    resp.setContentType("application/json;charset=UTF-8");
                    resp.setStatus(401);
                    PrintWriter out = resp.getWriter();
                    RespBean respBean = RespBean.error("登录失败!");
                    if (authException instanceof InsufficientAuthenticationException) {
                        respBean.setMsg("请求失败,请联系管理员!");
                    }
                    out.write(new ObjectMapper().writeValueAsString(respBean));
                    out.flush();
                    out.close();
                }
            });
}
密码加密并加盐
使用BCryptPasswordEncoder,处理方式如下
BCryptPasswordEncoder encoder = new BCryptPasswordEncoder();
String encode = encoder.encode(password);登录处理在WebSecurityConfig中进行配置
@Override
protected void configure(AuthenticationManagerBuilder auth) throws Exception {
    auth.userDetailsService(hrService).passwordEncoder(new BCryptPasswordEncoder());
}
axios请求封装、异常处理
端采用了axios来处理网络请求,为了避免在每次请求时都去判断各种各样的网络情况
异常处理
这里主要使用了axios中的拦截器功能
axios.interceptors.response.use(success=>{
    if (success.status && success.status==200 && success.data.status==500){
        Message.error({message:success.data.msg})
        return;
    }
    if (success.data.msg){
        Message.success({message:success.data.msg})
    }
    return success.data;
},error => {
    if (error.response.status == 504 || error.response.status == 404){
        Message.error({message:'服务器被吃了,正在跑路o(╯□╰)o'})
    } else if (error.response.status == 403){
        Message.error({message:'权限不足,请联系管理员'})
    } else if (error.response.status == 401){
        Message.error({message:'尚未登录,请登录'})
        router.replace('/')
    } else {
        if (error.data.msg){
            Message.error({message:error.data.msg})
        } else {
            Message.error({message:"未知错误"})
        }
    }
    return;
})写了一个RespBean,来进行请求处理
public class RespBean {
    private Integer status;
    private String msg;
    private Object obj;

    public static RespBean build(){
        return new RespBean();
    }
    public static RespBean ok(String msg){
        return new RespBean(200,msg,null);
    }
    public static RespBean ok(String msg,Object obj){
        return new RespBean(200,msg,obj);
    }
    public static RespBean error(String msg){
        return new RespBean(500,msg,null);
    }
    public static RespBean error(String msg,Object obj){
        return new RespBean(500,msg,obj);
    }
}
请求方法封装
let base = '';

export const postKeyValueRequest=(url,params)=>{
    return axios({
        method:"post",
        url:`${base}${url}`,
        data:params,
        transformRequest:[function (data){
            let ret = ''
            for (let i in data){
                ret += encodeURIComponent(i) + '=' + encodeURIComponent(data[i]) + '&'
            }
            return ret;
        }],
        headers:{
            'Content-Type':'application/x-www-form-urlencoded'
        }
    })
}

export const postRequest=(url,params)=>{
    return axios({
        method:'post',
        url:`${base}${url}`,
        data:params
    })
}
export const getRequest=(url,params)=>{
    return axios({
        method:'get',
        url:`${base}${url}`,
        data:params
    })
}
export const putRequest=(url,params)=>{
    return axios({
        method:'put',
        url:`${base}${url}`,
        data:params
    })
}
export const deleteRequest=(url,params)=>{
    return axios({
        method:'delete',
        url:`${base}${url}`,
        data:params
    })
}
递归查询与存储过程调用
递归查询
由于部门的层级不可控,因此如果我想要获取所有部门的完整json的话,就要采用递归调用,这里的递归调用我们可以利用MyBatis的ResultMap中的collection实现,核心代码如下:
<resultMap id="DepartmentWithChildren" type="top.zhengru.vhr.model.Department" extends="BaseResultMap">
    <collection property="children" ofType="top.zhengru.vhr.model.Department"
    	select="top.zhengru.vhr.mapper.DepartmentMapper.getAllDepartmentsByParentId" column="id"/>
</resultMap>

<select id="getAllDepartmentsByParentId" resultMap="DepartmentWithChildren">
	select * from department where parentId = #{pid}
</select>
存储过程调用
statementType调用表示这是一个存储过程,mode=IN表示这是输入参数,mode=OUT表示这是输出参数,调用成功之后,在service中获取department的id和result字段,就能拿到相应的调用结果了
<select id="addDep" statementType="CALLABLE">
	call addDep(#{name,mode=IN,jdbcType=VARCHAR},#{parentId,mode=IN,jdbcType=INTEGER},#{enabled,mode=IN,jdbcType=BOOLEAN}
		,#{result,mode=OUT,jdbcType=INTEGER},#{id,mode=OUT,jdbcType=INTEGER})
</select>
自定义参数绑定
正常情况下,前端传递来的参数都能直接被SpringMVC接收,当前端传来的一个日期时,就需要服务端自定义参数绑定,将前端的日期进行转换
自定义参数转换器
@Component
public class DataConverter implements Converter<String,Date> {
    SimpleDateFormat sdf = new SimpleDateFormat("yyyy-MM-dd");
    @Override
    public Date convert(String s) {
        try {
            return sdf.parse(s);
        } catch (ParseException e) {
            e.printStackTrace();
        }
        return null;
    }
}
配置转换器
这里按照我的理解,注册成为组件后,前端传来的参数就会经过这个参数转换器处理
上面只是我的猜测,等有时间我再测试测试…
员工数据Excel导入导出
下面以生成和解析xlsx格式的excel为例
生成Excel
创建文档,这里我使用的是xlsx格式的XSSFWorkbook
HSSFWorkbook workbook = new HSSFWorkbook();	//xls
XSSFWorkbook workbook = new XSSFWorkbook();	//xlsx
这一大串都是设置文档的基本信息(可选)
POIXMLProperties.CoreProperties coreProps = xmlProps.getCoreProperties();
coreProps.setCategory("员工信息");
coreProps.setCreator("zhengru");
coreProps.setTitle("员工信息表");
coreProps.setDescription("本文档由正如提供");

POIXMLProperties.ExtendedProperties extProps = xmlProps.getExtendedProperties();
extProps.getUnderlyingProperties().setCompany("zhengru.top");

XSSFCellStyle headerStyle = workbook.createCellStyle();
headerStyle.setFillForegroundColor(IndexedColors.YELLOW.index);
headerStyle.setFillPattern(FillPatternType.SOLID_FOREGROUND);
XSSFCellStyle dateCellStyle = workbook.createCellStyle();
dateCellStyle.setDataFormat(HSSFDataFormat.getBuiltinFormat("m/d/yy"));创建sheet表
XSSFSheet sheet = workbook.createSheet("员工信息表");创建一行(0表示第一行)
XSSFRow r0 = sheet.createRow(0);创建第一行第一个单元格设置数据
XSSFCell c0 = r0.createCell(0);
c0.setCellValue("编号");
c0.setCellStyle(headerStyle);将Excel写入ByteArrayOutputStream中创建ResponseEntity返回
ByteArrayOutputStream baos = new ByteArrayOutputStream();
HttpHeaders headers = new HttpHeaders();
try {
	headers.setContentDispositionFormData("attachment", new String("员工表.xlsx".getBytes("UTF-8"), "ISO-8859-1"));
	headers.setContentType(MediaType.APPLICATION_OCTET_STREAM);
	workbook.write(baos);
} catch (IOException e) {
	e.printStackTrace();
}
return new ResponseEntity<byte[]>(baos.toByteArray(), headers, HttpStatus.CREATED);
解析Excel
文件上传
@PostMapping("/import")
public RespBean importData(MultipartFile file) throws IOException {
    List<Employee> list = POIUtils.excel2Employee(file,nationService.getAllNations(),politicsstatusService
            .getAllPoliticsstatus(),departmentService.getAllDepartmentsWithOutChildren(),positionService.getAllPosition(),
            jobLevelService.getAllJobLevels());
    if (employeeService.addEmps(list) == list.size()){
        return RespBean.ok("上传成功!");
    }
    return RespBean.error("上传失败!");
}创建XSSFWorkbook对象
XSSFWorkbook workbook = new XSSFWorkbook(file.getInputStream());遍历sheet和sheet中的行、单元格(第一行是标题行),将遍历到的数据放入实例中
int numberOfSheets = workbook.getNumberOfSheets();
for (int i = 0; i < numberOfSheets; i++) {
    XSSFSheet sheet = workbook.getSheetAt(i);
    int physicalNumberOfRows = sheet.getPhysicalNumberOfRows();
    for (int j = 0; j < physicalNumberOfRows; j++) {
        if (j == 0){
            continue;
        }
        XSSFRow row = sheet.getRow(j);
        if (row == null) {
            continue;
        }
        int physicalNumberOfCells = row.getPhysicalNumberOfCells();
        employee = new Employee();
        for (int k = 0; k < physicalNumberOfCells; k++) {
            XSSFCell cell = row.getCell(k);
            switch (cell.getCellType()){
                case STRING:
                    String cellValue = cell.getStringCellValue();
                    switch (k) {
                        case 1:
                            employee.setName(cellValue);
                            break;
                        case 2:
                            employee.setWorkID(cellValue);
                            break;
                        case 3:
                            employee.setGender(cellValue);
                            break;
                        case 5:
                            employee.setIdCard(cellValue);
                            break;
                        case 6:
                            employee.setWedlock(cellValue);
                            break;
                        case 7:
                            int nationIndex = allNations.indexOf(new Nation(cellValue));
                            employee.setNationId(allNations.get(nationIndex).getId());
                            break;
                        case 8:
                            employee.setNativePlace(cellValue);
                            break;
                        case 9:
                            int politicstatusIndex = allPoliticsstatus.indexOf(new Politicsstatus(cellValue));
                            employee.setPoliticId(allPoliticsstatus.get(politicstatusIndex).getId());
                            break;
                        case 10:
                            employee.setPhone(cellValue);
                            break;
                        case 11:
                            employee.setAddress(cellValue);
                            break;
                        case 12:
                            int departmentIndex = allDepartments.indexOf(new Department(cellValue));
                            employee.setDepartmentId(allDepartments.get(departmentIndex).getId());
                            break;
                        case 13:
                            int jobLevelIndex = allJobLevels.indexOf(new JobLevel(cellValue));
                            employee.setJobLevelId(allJobLevels.get(jobLevelIndex).getId());
                            break;
                        case 14:
                            int positionIndex = allPosition.indexOf(new Position(cellValue));
                            employee.setPosId(allPosition.get(positionIndex).getId());
                            break;
                        case 15:
                            employee.setEngageForm(cellValue);
                            break;
                        case 16:
                            employee.setTiptopDegree(cellValue);
                            break;
                        case 17:
                            employee.setSpecialty(cellValue);
                            break;
                        case 18:
                            employee.setSchool(cellValue);
                            break;
                        case 20:
                            employee.setWorkState(cellValue);
                            break;
                        case 21:
                            employee.setEmail(cellValue);
                            break;
                    }

                default:{
                    switch (k) {
                        case 4:
                            employee.setBirthday(cell.getDateCellValue());
                            break;
                        case 19:
                            employee.setBeginDate(cell.getDateCellValue());
                            break;
                        case 23:
                            employee.setBeginContract(cell.getDateCellValue());
                            break;
                        case 24:
                            employee.setEndContract(cell.getDateCellValue());
                            break;
                        case 22:
                            employee.setContractTerm(cell.getNumericCellValue());
                            break;
                        case 25:
                            employee.setConversionTime(cell.getDateCellValue());
                            break;
                    }
                }
            }
        }
        list.add(employee);
    }
}
} catch (IOException e) {
e.printStackTrace();
}
自动发送入职邮件
引入了RabbitMQ消息队列
创建消息队列
在启动类里创建消息队列
@SpringBootApplication
public class MailserverApplication {

    public static void main(String[] args) {
        SpringApplication.run(MailserverApplication.class, args);
    }

    @Bean
    Queue queue(){
        return new Queue("zhengru.mail.welcome");
    }
}
创建邮件处理类
创建邮件处理类,将员工信息写入邮件模板并发送
@Component
public class MailReceiver {

    public static final Logger logger = LoggerFactory.getLogger(MailReceiver.class);

    @Autowired
    JavaMailSender javaMailSender;
    @Autowired
    MailProperties mailProperties;
    @Autowired
    SpringTemplateEngine springTemplateEngine;

    @RabbitListener(queues = "zhengru.mail.welcome")
    public void handler(Employee employee){
        logger.info(employee.toString());
        MimeMessage msg = javaMailSender.createMimeMessage();
        MimeMessageHelper helper = new MimeMessageHelper(msg);
        try {
            helper.setTo(employee.getEmail());
            helper.setFrom(mailProperties.getUsername());
            helper.setSubject("入职欢迎");
            helper.setSentDate(new Date());
            Context context = new Context();
            context.setVariable("name",employee.getName());
            context.setVariable("posName",employee.getPosition().getName());
            context.setVariable("joblevelName",employee.getJobLevel().getName());
            context.setVariable("departmentName",employee.getDepartment().getName());
            String mail = springTemplateEngine.process("mail", context);
            helper.setText(mail,true);
            javaMailSender.send(msg);
        } catch (MessagingException e) {
            e.printStackTrace();
            logger.error("邮件发送失败:" + e.getMessage());
        }
    }
}
配置发送消息
在添加员工的业务逻辑里加入发送消息
rabbitTemplate.convertAndSend("zhengru.mail.welcome",emp);在线聊天功能
引入了websocket,我记得上一次用ws写的是一个聊天室,也就是群聊
vhr中用ws实现了点对点消息传输,也就相当于私聊
配置websocket
使用了websocket的子协议stomp,消息代理使用了/queue,上面也说了因为我这里是点对点的私聊
@Configuration
@EnableWebSocketMessageBroker
public class WebSocketConfig implements WebSocketMessageBrokerConfigurer {
    @Override
    public void registerStompEndpoints(StompEndpointRegistry registry) {
        registry.addEndpoint("/ws/ep").setAllowedOrigins("*").withSockJS();
    }

    @Override
    public void configureMessageBroker(MessageBrokerRegistry registry) {
        registry.enableSimpleBroker("/queue");
    }
}
创建websocket处理类
创建ws处理类
@Controller
public class WsController {
    @Autowired
    SimpMessagingTemplate simpMessagingTemplate;

    @MessageMapping("/ws/chat")
    public void handleMsg(Authentication authentication, ChatMsg chatMsg) {
        Hr hr = (Hr) authentication.getPrincipal();
        chatMsg.setFrom(hr.getUsername());
        chatMsg.setFromNickname(hr.getName());
        chatMsg.setDate(new Date());
        simpMessagingTemplate.convertAndSendToUser(chatMsg.getTo(), "/queue/chat", chatMsg);
    }
}
关于部署
因为服务器快到期了,还没怎么用过,仅仅只是跑了几个脚本感觉有点浪费,所以把这个项目部署一下顺便也可以学习一下怎么配置nginx的跨域
打包
SpringBoot打包
首先就是对springboot项目的打包,这里就已经踩坑了。。。。
第一次打包出来的是不可执行的jar
运行的时候提示没有主清单属性,网上对此的解决方法也非常多
主要的原因就是没有配置启动类,在Maven打包的插件下面加上mainClass即可
<configuration>
    <mainClass>top.zhengru.vhr.VhrApplication</mainClass>
    <skip>true</skip>
</configuration>
Vue打包
前端打包倒是挺顺利的,直接使用下面的命令即可生成一个dist文件夹
npm run build上传
把刚刚dist文件夹内的文件和jar包扔到服务器www/wwwroot/http目录里即可(这里http文件夹名字自己定)
添加站点
然后在宝塔面板的网站-添加站点里输入域名、根目录即可
配置跨域
在站点的配置文件里配合跨域
这里配置的是80->8081,因为我后端的端口是8081
location / {
    if ($request_uri !~ "^/$") {
    	proxy_pass http://127.0.0.1:8081;
    }
    tcp_nodelay     on;
    proxy_set_header Host            $host;
    proxy_set_header X-Real-IP       $remote_addr;
    proxy_set_header X-Forwarded-For $proxy_add_x_forwarded_for;
}

location ~ .*\.(js|css|ico|png|jpg|eot|svg|ttf|woff|html|txt|pdf|) {
    root /www/wwwroot/http; #所有静态文件直接读取硬盘
    expires 30d; #缓存30天
}
启动后端
没啥好说的就是添加java项目,当然也可以在命令行启动,不过要注意要加入一直启动的参数,否则一关命令行窗口,后端就关闭了


